Prince of Persia: The Lost Crown – Game Diary

I’ve never played a Prince of Persia game before! Not the old ones with the rotoscoped animation and the punishing gameplay, or the more recent ones with the parkour-based platforming and the multiple reboots. Having gotten into Metroidvanias in recent times, I decided that Prince of Persia: The Lost Crown might as well be my introduction to the venerable franchise, and picked it up physically on PS5 for the criminally cheap price it’s reaching nowadays. So join with me now as I head into the mysterious and dangerous labyrinths of Mount Qaf! I’m sure we’ll have a royally good time. 

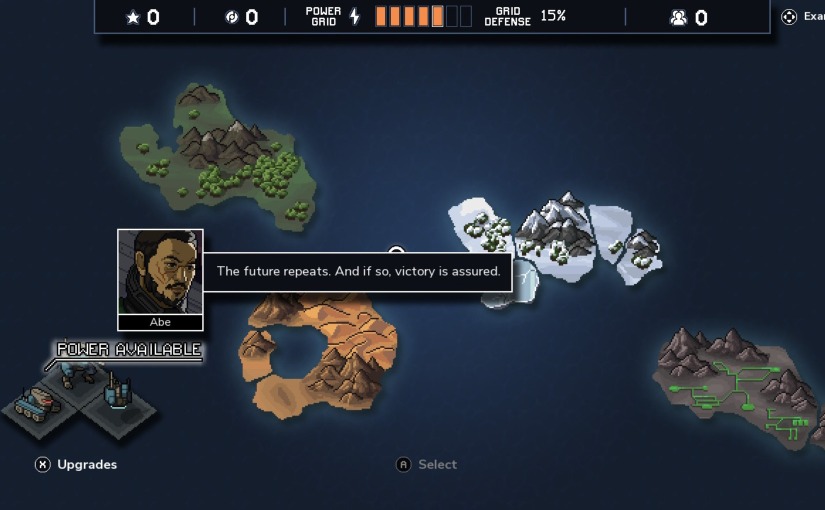
Session 1 – 17th October

First off, amidst all the screen brightness settings and what have you, there was an option to turn navigation on or off. It seems that putting it on would point out different objectives and pick-ups on the map to help beginners. I chose to leave it off, I’m a seasoned pro at Metroidvanias now after all. I’ve played at least four.

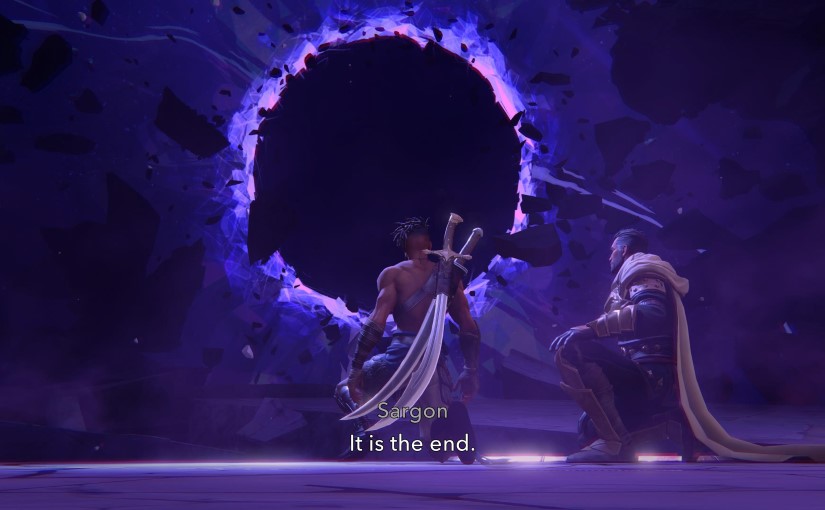
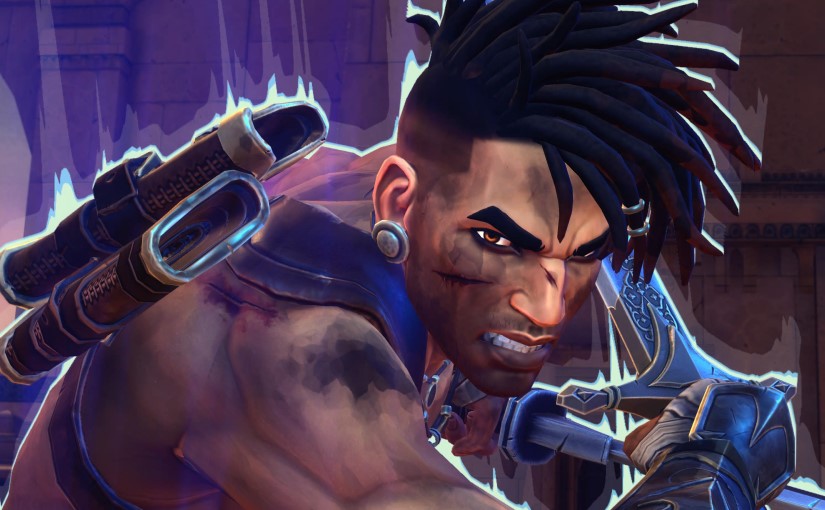
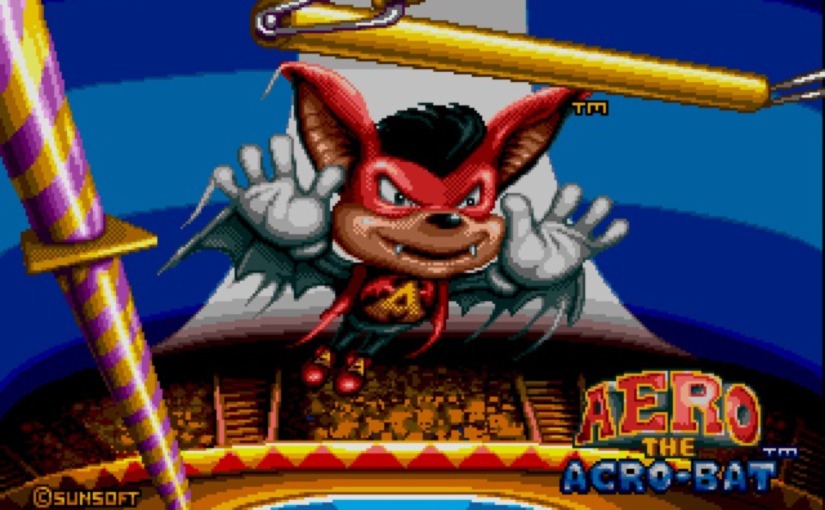
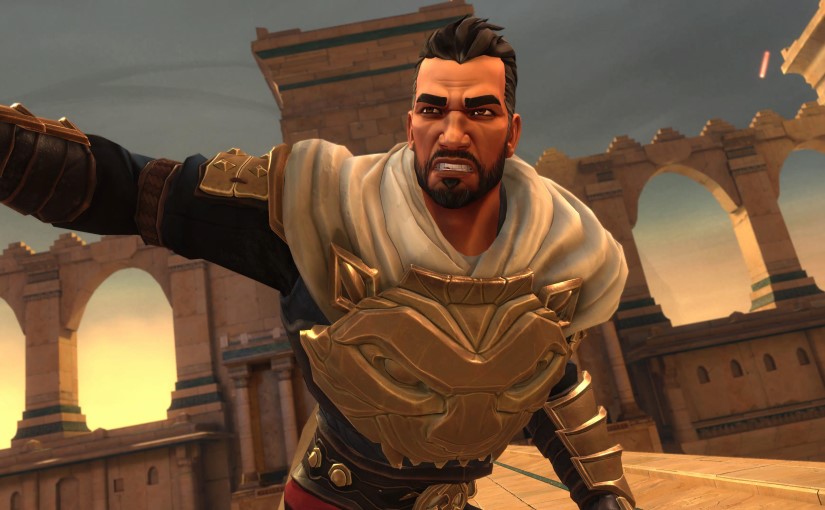
The opening cutscene used static art, talks about Persia suffering through thirty years with no rain, and describes an attack by people called the Kushans. Things were bleak until the “seven immortals” arrived on the scene. These were the best warriors in the kingdom, and one of them is put under my control. It’s time to say hello to the super-handsome and ripped (and admittedly very cool) dual-wielding swordsman, Sargon. We negotiated an eerily lit battlefield, fought alongside our fellow Immortals at different points, and took out a general on his horse in a battle that kind of reminded me of the second boss in 2006 Ninja Gaiden, although nowhere near as difficult.

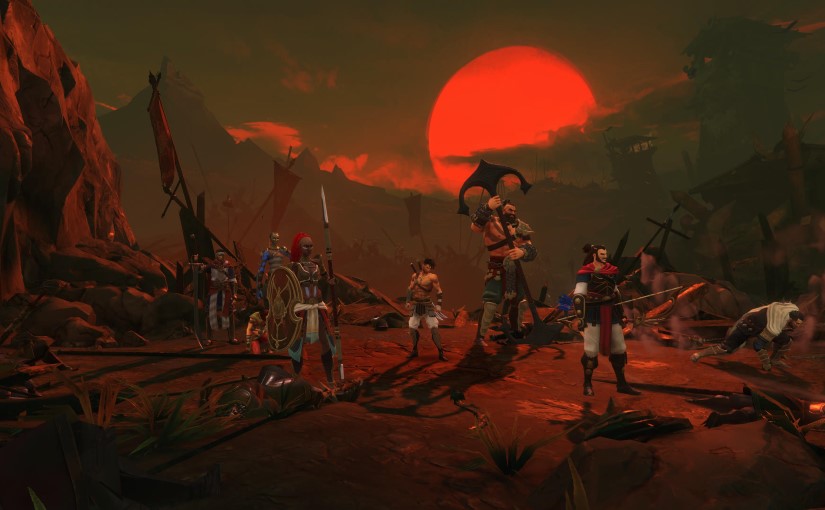
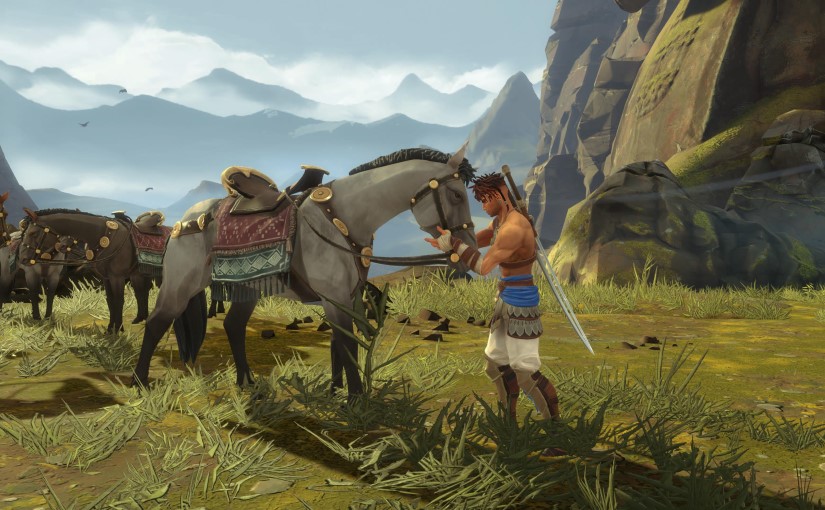
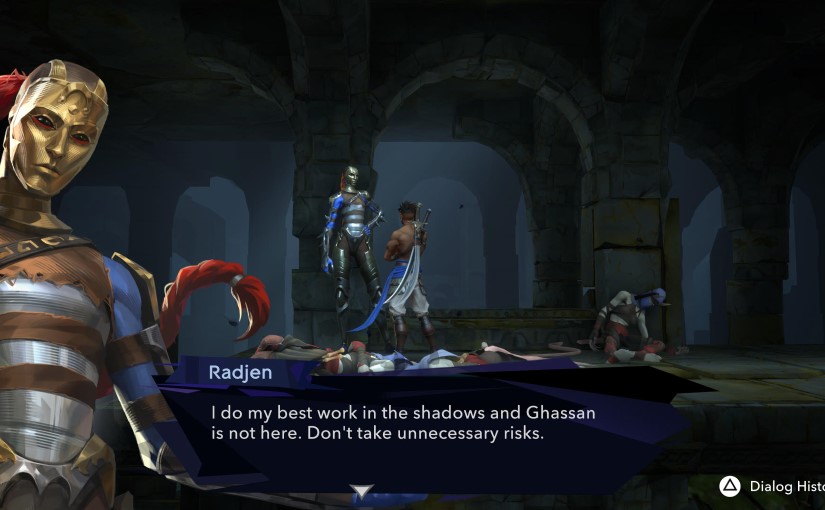
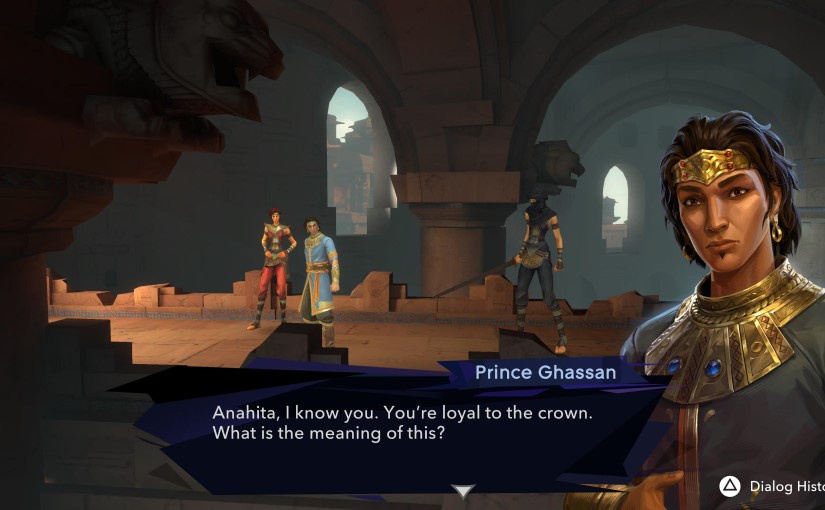
There was a bit of a celebration at the palace after this, but there’s an ill wind blowing (there’s literal talk of winds of destruction and other such bleak, windy concepts). We’re introduced to the Prince of Persia, a fellow named Ghassan that everyone pronounces Hassan. I may have played a Prince of Persia game now, but I still haven’t played as the titular royalty. Anyway, Sargon is given a sash by the Queen of Persia and then retires to the rooftop with his fellow immortals. They have a bit of banter to further introduce the Immortals but I failed to take down any of their names. There’s a big guy who wields an anchor of some kind, an archer guy who reminds me of Bard from the Hobbit films, an older fellow with a longsword and a mask on half his face, a heroic-seeming guy in a white cloak who appears to be in charge, a tall lady with a spear and long, red dreadlocks, and an even taller lady in a scary mask. She’s missing from the rooftop banter session, but she soon turns up to inform the group that the Prince has been kidnapped. I knew there was an ill wind blowing.

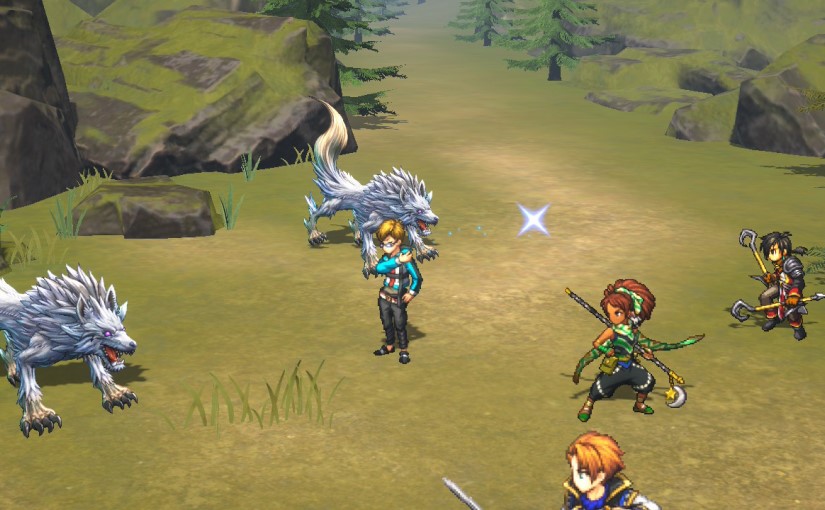
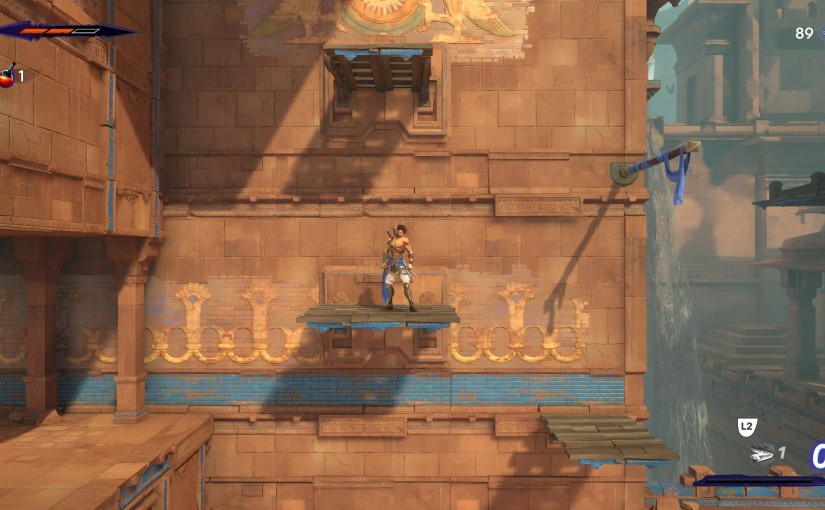
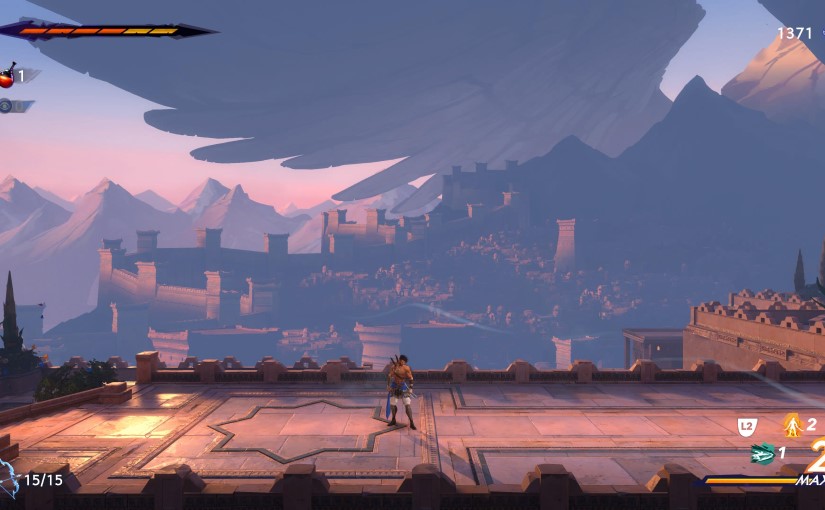
It soon became apparent that Sargon’s trainer, a lady called Anahita, took him, so Sargon is emotionally invested, and we fought some of her minions. I like the combat early on. It flows and feels flashy. A simple combo, dodge, and parry system with special moves similar to many games of this type. The graphics are cool, too. I like the 3D world even though the gameplay is on a strict 2D plane, and the character models are excellent and have a painterly feel. I like it!

One thing I did notice in this opening sequence though, is that even though Sargon seems to be built like a guy of at least average height, everyone seems to tower over him, from his fellow immortals to the palace guards. Only Bard the Bowman is of equal height. As a fellow of over six feet I cannot relate to this.

Anyway, the Immortals, Sargon, and I chased the Prince and his captors to a nearby mountain called Mount Qaf, which seems to have mystical properties, and Sargon’s companions deduced that Anahita might be trying to gain the throne by using the Prince’s royal blood to get through a mystical door or something. An old, abandoned city seems to be on the mountainside, and the area is littered with twisted corpses that are definitely going to come to life.

They came to life.

I’m struggling to figure out if the combat is easy or difficult at this point. Everything is very straightforward and the enemies give plenty of warning for their various attacks, but I’m still managing to get caught out. It doesn’t help that I’ve come off the back of recently playing Shinobi: Art of Vengeance, and am expecting Sargon to share Joe Musashi’s moves and agility. I don’t mind admitting that I let Sargon die a few times.

There’s also a mechanic where you can take screenshots of areas that you think you might need to come back to. I’m not sure how necessary it is – like I said, I’m clearly a Metroidvania pro now – but I’ll try it out.

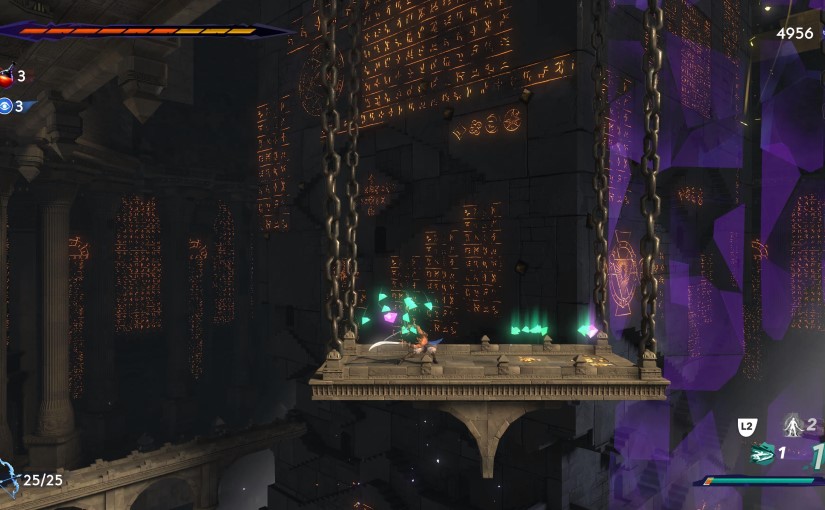
We hit some strange crystals that caused a statue frozen in a broken, falling state to reform and let us reach new areas, and there definitely seems to be a time vacuum thing going on. There are undead people who claim to have been here for thirty years too but the team seems to think that they got there the day before, and there are some NPCs that seem to have been trapped for that long without realising how much time has passed. There were also hallways festooned with spiky traps which seems to very much call back to the classic Prince of Persia games, which I appreciated despite never having played them.

We met a child who seems to dwell in the mountain, and later found a lady in a placed called the Haven who can sell us amulets and things. There’s also a blacksmith deity in this area for upgrades, and one of the Immortals takes up residence in this same safe area and offers training. It’s the older guy with the half-mask. I forget his name. Speaking of which, people keep mentioning someone called Ardashir as if I’m supposed to know who that is but I must have missed it. I’m pretty sure they’re not any of the Immortals.

To finish off this session, Sargon and I found one of the save point trees that had a talking head in it that reminded me of Mimir from the modern God of War games, (and it was at this point that I decided I’m not too sold on the voice acting) and then we fought a giant, brutish boar. Beyond this Sargon found a deceased version of himself alongside Bard’s bow (I forget the bow guy’s real name, too, sorry. I’ll get them all before the end, okay?). This bow means that we can shoot an out-of-reach crystal and get back on the prince’s trail! I’ll do that next session, though. I’ve had enough prince hunting for now.

Session 2 – 17th October

I found some more time to play on the same day! But this session would be a short one.

Instead of going after Princey, Sargon and I decided to do some more exploring. The game seems to encourage exploring early on more than most Metroidvanias I’ve played, although maybe again I’m basing that on the very combat-focused Shinobi: Art of Vengeance, which has Metroidvania elements but probably couldn’t be classified as one.

During this exploration session I observed that I would often go to use the d-pad to move, but you can only move Sargon using the analogue stick, and down on the d-pad takes a screenshot for the map screen. I do quite like this screenshot mechanic now, as making use of it reduces needless backtracking if you’ve forgotten why you couldn’t get through an area and go back there with a new ability only to realise you still can’t get through. It also has limited uses to discourage screenshot spam, but I haven’t got anywhere near the limit yet.

We explored for a while and found mostly temporary dead ends, and were on our way to go after the Prince when I remembered the giant elevator in the middle of the map which opened up another huge area for us to explore, so we did that. I then also remembered a spooky sewer-like area in the depths of the map that the tall, masked lady told us not to bother with back along. We mooched around there for a while but the enemies were kind of tough and we never found a respawn point so we decided to come back later.

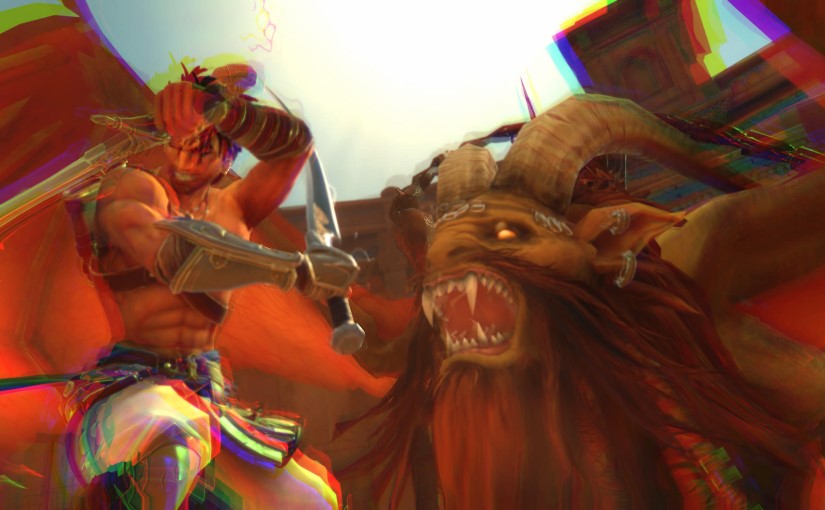
We set off after the Prince, and this new area led to a boss fight in a ruined arena with a big, scary chimera-type creature. We beat him first time and received a sparkly feather which enabled Sargon to air-dash just like Joe Musashi, and it uses the same button too! I was very happy with this as I’d been trying to do it all the time anyway. Doing the air-dash also makes a sound effect come out of the controller, a feature that Prince of Persia: The Lost Crown seems to make use of often.

Despite beating a scary monster there was still no sign of the missing Prince, so we went back to exploring with the new air dash and we finally unlocked fast travel, which is possible between strategically placed statues around the map.

After a while, Sargon finally spotted Anahita and the Prince off in the background, and we overheard Anahita telling her guards not to be too rough with him. Is she going to have honourable intentions? One of the Immortals (the leader fellow in the white cloak) showed up to help during the ensuing fight with Anahita’s (incredibly skinny and lanky) minions while Anahita and the Prince scurried off somewhere.

The next area after this was an enormous archive of knowledge inhabited with mad alchemists, and the boss stalks the area. He seems to be a blind fellow capable of one-hit kills and there are sections where Sargon must avoid his hearing radius or risk being smushed by the boss’ big, horrible stick. This reminded me of the E.M.M.I. areas in Metroid Dread. I decided to quit at this point, but not because I was scared, okay? The wife had come home from work and it was time to get some food. Priorities, you know.

Session 3 – 18th October

We decided to start this session by heading down into the Depths area again but we passed by the Haven on the way. The little girl’s name is Fariba and she sells maps and hints for time crystals. We’ve bought the maps when she’s offered them but have resisted hints so far. There was also a new door in the Haven that goes to a challenge room. Sargon and I tried the first one and it was a dangerous platformer section in the vein of Shinobi: Art of Vengeance’s Ankou Rifts, but I think more difficult. We decided to come back later. Maybe.

A similar decision was made in the Depths. We got further in but the enemies were still kind of a pain and we still couldn’t find a tree, so we headed back to the Archive area and tried to make some progress. We quickly found a fellow referred to as the “Moon Gatherer” and this kicked off another side quest. The game gives you the option to decline side quests but I don’t see any reason not to just accept anything, so that seems strange. This Moon Gatherer is another one who absolutely towers over Sargon, and this especially brought home the height discrepancy thing to me. What is going on here? Is Sargon some kind of pixie man?

Anyway, after some further exploration I accidentally let Sargon get caught by the big boss guy who stalks the Archive. He zapped us into a prison with his nasty stick, but it was very easy to escape. Exploring this area Sargon apparently got possessed by a horrible enemy with a long, tentacle tongue and was stuck on one health bar. I found myself wondering if a tree would cure this possession but Sargon got killed before we had the chance to find out.

Not long after this we came across another Sargon! This one was very much alive and said something about needing our power because we want the same thing, and we had to fight him! We beat him first time, though, and unlocked a new special move.

Continuing on we found another external area with quite the view. There was a gigantic, and I mean gigantic, wing in the background, apparently made of rock. Following this area took us to the very top of the elevator mentioned earlier on the other side of a trap door that couldn’t be opened from below. There was a stretch where Sargon had to fight off a flock of harpies and some of Anahita’s guards and we got killed here a lot. I really think I’m still suffering from the Shinobi muscle memory, as I tend to jump into battle with multiple enemies expecting to be able to outmanoeuvre them, hit and run, and get away scot free, but Sargon can’t do that, and we ended up surviving this stretch easily by moving forward more cautiously and taking on enemies one or two at a time. That’s the key I think.

There were some nasty new enemies in the next area and the way Sargon had to manoeuvre to get to them left him open to attack when he leapt to the platform they were on. We perished a couple of times and I decided that it was time to go to bed. It was getting late and I was tired of dying on a cursed mountain in ancient Persia.

Session 4 – 19th October

We started Session 4 by going back to Haven for some upgrades, and then started to progress towards the mountain top. We met a crazy looking old fellow who said some cryptic timey-wimey stuff, and then took in some pretty awesome and inspiring scenery before finally catching up to the Prince outside a big building that looked like a giant astrolabe type thing.

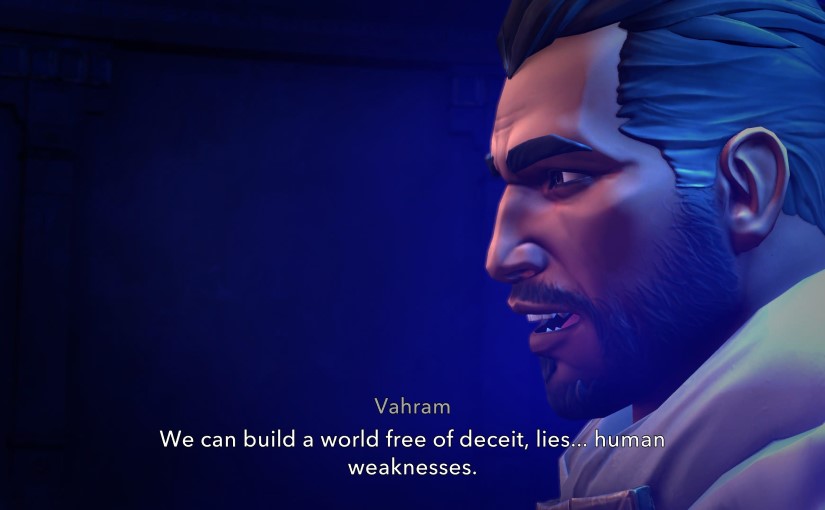
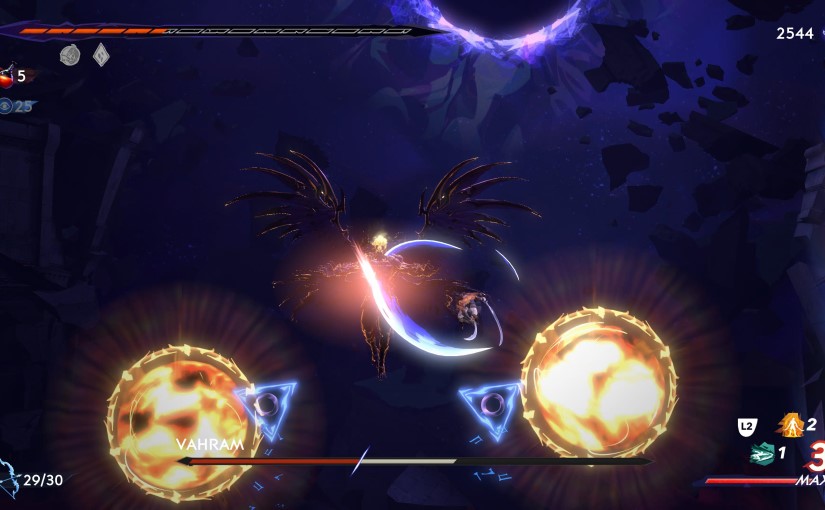
As Sargon and I went to confront Anahita, Vahram turned up and full on killed Prince Ghassan graveyard dead. What the heck? He’s the bad guy! We then had to fight Vahram and he beat us. I feel like I could have won this despite the fact that parries and special moves did nothing, but it would have been a grind and I have a feeling it would have ended up with the same cutscene anyway. Vahram got dark, time-based towers, revealed he wants to rule, beat up Sargon and threw him off the temple, then went about his business. Anahita managed to slip away thanks to Sargon’s heroics. It was all good stuff!

We then got a quick origin cutscene of Sargon meeting the Immortals, looking all frazzled and scrawny, with glowing blue eyes. He wanted to fight Vahram and, though he lost, Vahram welcomed him into the ranks of the Immortals. What’s going on there, then? I made a note here that the archer, who I’ve been calling Bard, is actually called Menolias. He still looks like Bard, though.

Anyway, down at the bottom of the pit Sargon was thrown into, he wakes up, and the weird old man is there. The old man took the artefact that enables us to use the map and stuff, so we had to give chase. We’re back in the Depths and we can’t back out this time. Also, the music here sometimes has a very unsettling scream in it.

A long chase through the Depths with no map to help us ensued, and we encountered a horrible spider man who sells stuff for the other type of currency we’ve been finding called Xerxes.

Eventually we followed the odd old fellow to a room with some time warping effects going on and another fight with another Sargon ensued. This is a Sargon who “chose a different path”, and we beat him the second try and got another special move. We also found another feather which gave Sargon a cloning type ability. I initially assumed that it would be used for “two-switches-at-once” type puzzles, but it actually leaves a crystalline echo of Sargon that he can then warp to, which definitely unlocks some interesting puzzle and combat potential.

While this feather was claimed there was a big, crystalline bird looking down at Sargon from the background, and I think it’s the same somewhat intimidating bird that’s spotted briefly in the game over screen. This is “the Simurgh”, the power behind Mount Qaf that approves new rulers.

The old man finally gave us our map back (although apparently he never took it, but I couldn’t bring up the map so he did something), and said that Ghassan can still be saved, probably using time stuff. Sargon and I have to go to a place called the Pit of Eternal Sands and confront some scary-sounding entity next, but there’s more exploring to be done first.

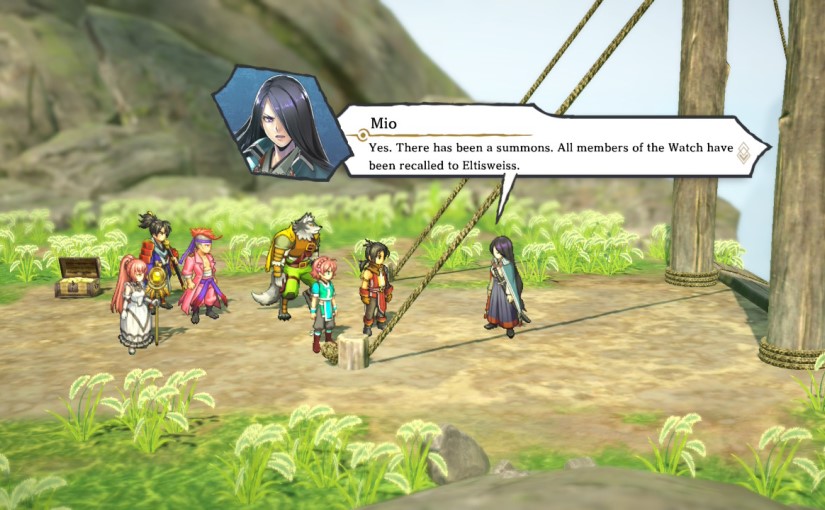
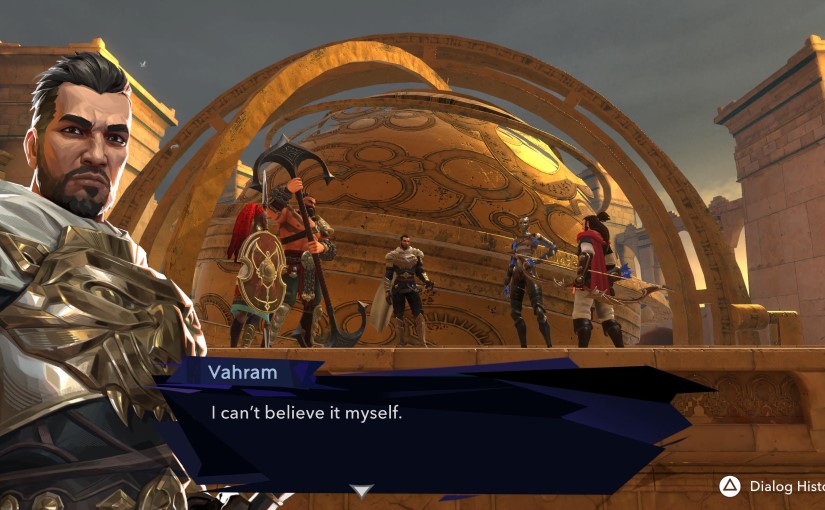
On the way out of the Depths (you can only fast travel from fast travel points, not from anywhere on the map) we ran into the red-dreaded warrior lady. Her name is Neith, and she asked Sargon if it’s true that he killed the Prince. We get a cutscene that shows Vahram telling the other Immortals that Sargon killed Ghassan and that he and Anahita got away, and he also tells them that he’s going to become ruler as the Queen has had her chance and the kingdom has suffered 30 years without rain and a Kushan invasion. I got all their names here. The scary mask lady is called Radjen, and she seems very keen on joining Vahram’s bid for the throne, as does Menolias. The big guy is called Orod, who also seems on board with Vahram, leaving only Neith who still wants Sargon to have his say. Lucky we ran into her first, then, because she believes Sargon and decides to stand against the other Immortals.

There’s also the Immortal who stayed at Haven, the half-mask older guy. His name is Artaban and he seems to be staying on-side with Sargon, too.

After these sweeping story developments me and Sargon explored the Depths a bit more and found an even darker and creepier location called the Catacombs. We turned back for the time being and headed back to the Haven for some upgrades before wondering into yet another new area back past the Archive where many of the enemies were invincible thanks to hard-to-reach mages giving off some kind of invincibility aura. The map just keeps expanding and expanding!

Feeling a little overwhelmed by all the new areas, Sargon and I headed back down to the Haven and upgraded our swords one more time before calling it a session. It was lunchtime, and the child and I were hungry.

Session 5 – 19th October

A late session this time. I’m very aware that my copy of Ninja Gaiden 4 will be arriving in the post in a couple of days and am wanting to get this game done. However, it’s gonna take as long as it takes. Sargon and I headed to the Catacombs, hoping to get the story moving as it looked like the nearest place to the Pit of Eternal Sands.

The Catacombs had a nice atmosphere, and by that I mean a dark, dreary, and unsettling atmosphere with spooky music, dark, scary holes everywhere, and gross matter stuck to the walls and floors with egg sack-like things scattered about. It’s so dark that a fiery eye creature had to accompany us to light the way.

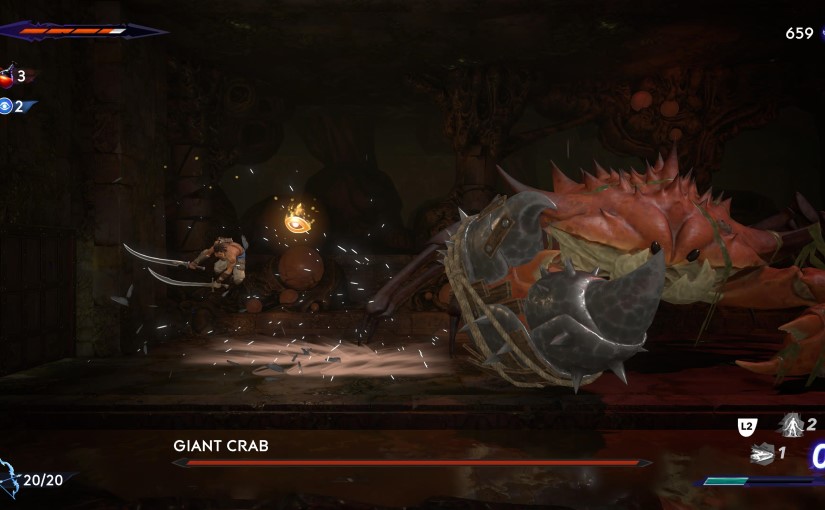
We were somewhat surprised to be confronted by a giant enemy crab in this area! A bit of a “big-lipped alligator moment” as they say, but I liked the crab, he had metal armour around one of his claws and Sargon had to get rid of that before he could do much damage. We beat him first time and headed on to the Sunken Harbor, where we found the entrance to the Pit of Eternal Sands. We couldn’t get in yet, though, and the old man was there, saying cryptic shit to us. We headed back to Haven for some upgrades and then had an explore.

We explored the Sunken Harbor and found another new area called the Soma Tree, which has a tainted forest vibe and there were antagonistic Ents walking around. The save tree here looked all knackered and gross and there was a weird head that wouldn’t talk to us, but the tree still healed Sargon and saved the game so whatever.

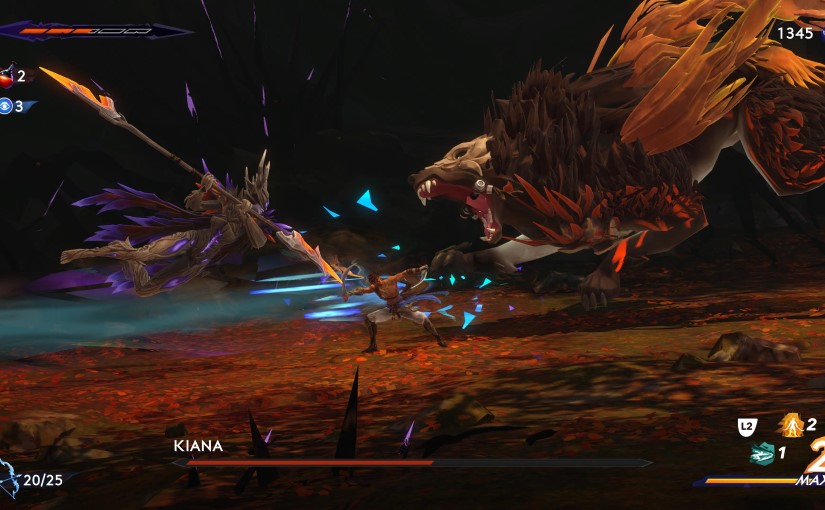
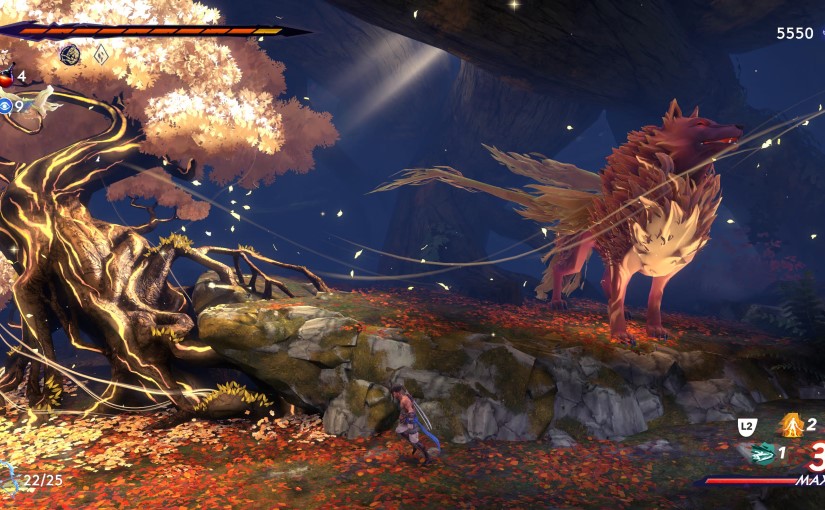
Soon after this we found a random child, who we had actually seen in the background ages ago but I had forgot to mention. Sargon spoke to him and he gave his name as Varham. Interesting. Sargon was nice to him and he disappeared. Not long after this we found another boss fight, a scary tree lady mounted on a giant, winged wolf. This was a badass fight and was very cinematic. It was the toughest fight yet and took me three tries. Sargon slew the tree lady and the wolf was freed from her control. He thanked us and headed off into the woods to live in peace.

We found another feather next, and now Sargon can take enemies into a pocket dimension and then throw them. Normal enemies will temporarily fight on our side after they’ve been pocked planed, but explosive enemies and items will cause damage and smash through breakable walls. This mechanic was used immediately to get out of the local area, but how are we supposed to explode the breakable walls we’ve seen throughout the map without convenient nearby explosive spores?

Anyway, we explored a bit more before bedtime and found a few interesting bits and bobs, most importantly a fight against a pair of alternate Sargons. We beat them easily and got another special move, and it was time for bed. The safety of the Kingdom of Persia will have to wait, I need my beauty sleep!

Session 6 – 20th October

I decided to sit down to a morning session before I did today’s exercise routine, and did so with my free hot chocolate from the local Co-operative. Sargon and I felt a little aimless when we started off, but the old man’s cryptic clues seemed to imply that the abilities Sargon would need to get into the Pit of Eternal Sands could be found in the forest area and the Temple of Knowledge area past the Sacred Archive. We got the forest one already, so we headed to the archive.

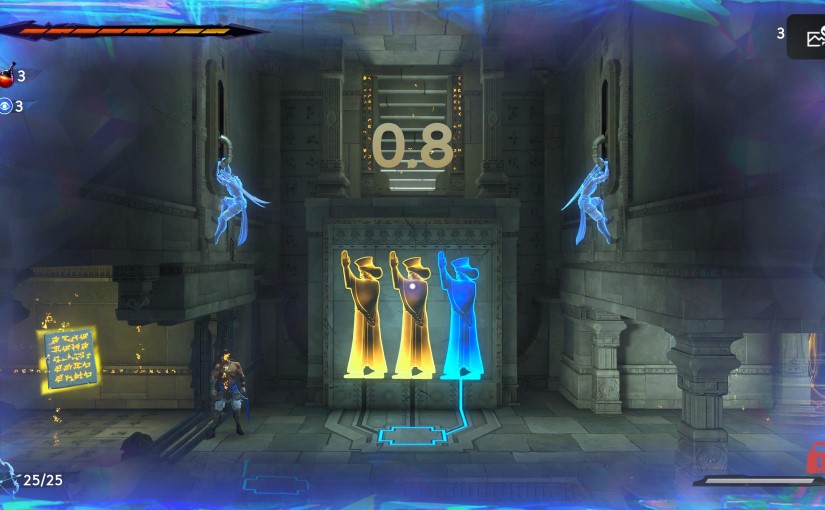
We found a series of pretty cool puzzles here where you have to activate an artefact that creates multiple versions of Sargon in turn, and you have to use the first two to prepare the way so that the final Sargon can get to the goal. They were good brain-teasers. We got to the third and I couldn’t work it out and concluded that we must need another ability, but I’m not sure. We bashed our heads against it for a while and then decided to look elsewhere, but couldn’t see any other ways forward in the Temple of Knowledge.

We headed back to the Depths and found an undead version of the early boar boss. We smushed it easily but at first it seemed we only got a child’s toy collectible with a creepy nursery rhyme about locked up children written on it, but on the way back into the undead boar room we were confronted with a hooded “old woman” that turned out to be one of the spider creature things and we got an amulet out of it. An interesting little side occurrence.

I should also note here that there’s a side quest where you find pieces of a prophecy and gradually unlock a large relief sculpture on a wall, and the prophecies seem to be mentioning “two princes” a lot. Hmm, maybe I am playing as a “Prince of Persia” after all. We’ll see.

Anyway, we finally conquered the Depths and moved on to the Sunken Harbor. We found some treasures and leapt around some spiky traps and made our way to a Wak-Wak Tree we’d previously discovered. That’s what the save points are called, by the way, Wak-Wak Trees. Sorry I’d not provided that information so far.

Anyway, it was time to get my workout on. Soon I’ll be just as ripped as our Sargon! This is a lie. I will definitely never be that ripped.

Session 7 – 20th October

It’s a post-exercise session, and Ninja Gaiden 4 is officially in the post! Judging by how much of the map is left and how we keep finding new areas, I don’t think I’ll be finishing this before Ryu Hayabusa and friends jump through my letterbox.

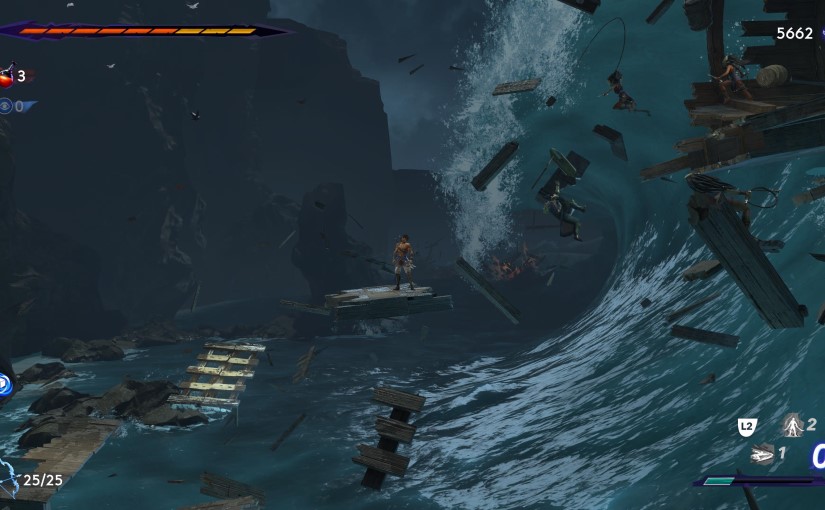
Sargon and I continued our exploration of the Sunken Harbor and spent quite a long time mooching about. We ran into a mimic chest creature, which I did not expect, and then we bumped into Orod, the big guy Immortal with the anchor weapon. He believes Vahram’s story and wants a fight, but wants to do it out to sea. We followed him and found the area that made me want to buy this game when I watched someone playing it briefly on YouTube, a gigantic wave, frozen in time, with ships and sailors being thrown everywhere. It’s an absolutely spectacular scene, but we can’t seem to get any further so we’ll have to come back later.

We’ve done all we can in the Sunken Harbor for now, it seems, although we did discover that explosives can be carried through fast travel using that dimensional pocket ability. This means that distant broken walls will just need to be broken through with explosives carried from far away. Using this technique we got back to the very first area and found that it has since been inhabited by giant birds! We fought a few of those and got to the very beginning of the map but mysterious sorcery keeps us on the mountain. Imagine of Sargon could have just walked home.

We couldn’t really see much else to do so we headed back to the Archive area to try those puzzles again that I mentioned in the last session. You know, the ones where you have three versions of Sargon attempt an area in turn. I finally got through the puzzle I’d given up on before – it turns out you just need to be fucking quick. Like, really bastard quick. The next puzzle was clever but we figured it out, and the next thing we knew Sargon had found another feather and gained a dimensional shift ability that allows him to use or pass by interdimensional barriers. It’s not a double jump, and there seem to be so many inaccessible areas that Sargon would need a double jump to get to, but it’s still good, as we’ve run into loads of the mystical blue barriers, too.

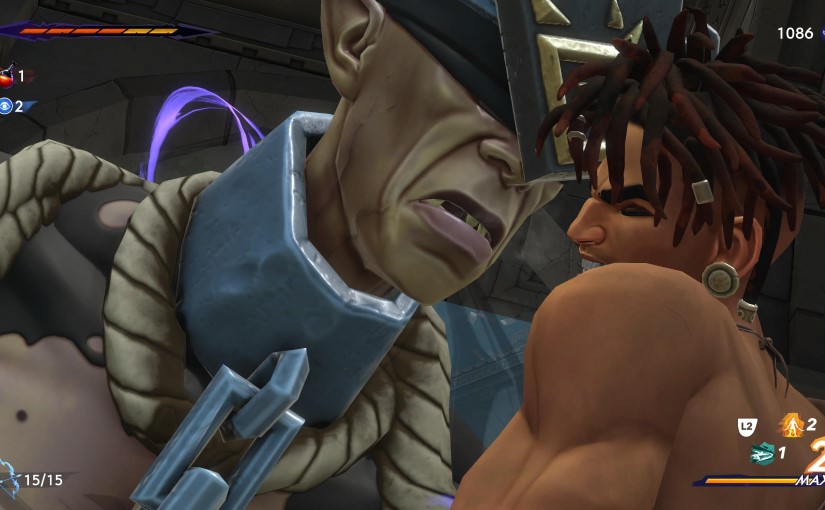
After claiming this feather we finally got to take on the Jailer, the big guy who put us into jail with his horrible stick. This is a hectic fight with adds, and it took me a few tries. During the second wave one of the adds is one of the guys who can possess Sargon and reduce his maximum health drastically, and if he gets you it’s incredibly hard to emerge victorious. We got him in the end, though, and claimed his key to open all his jail doors. Between that and the dimension-shifting mechanic lots of stuff is opened up to us now.

We did a great deal of exploring after this, going all over the continuously expanding map and finding bits and bobs, until eventually going to unseal the entrance to the Pit of Eternal Sands. This place has been built up quite a bit and it is very cool, with some neat backgrounds, giant crystalline thorns, and giant sand waterfalls. It has a very Arabian Nights feel and I like it. I had only planned to have a quick look at this place, but Sargon and I ended up exploring it extensively. We found another Sargon and got his special move, and eventually reached the old man and a Wak-Wak Tree head person who were building up our next foe; a creature known as Azhdaha, who I’m predicting is going to be some kind of snake creature.

We’ll have to find out next time, though, as I ended up playing for ages and needed to get on with other stuff! See you next session.

Session 8 – 20th October

Yet another session, a late one this time, and it looks like we’ve got to unseal this Azhdaha’s lair before we can fight it. Upon going after the seals Sargon and I come across lots of crushing blocks that look a lot like snakes, so that’s lending credence to my “Azhdaha is a snake” theory. There are also giant centipedes around, too, so maybe it could be the centipede queen.

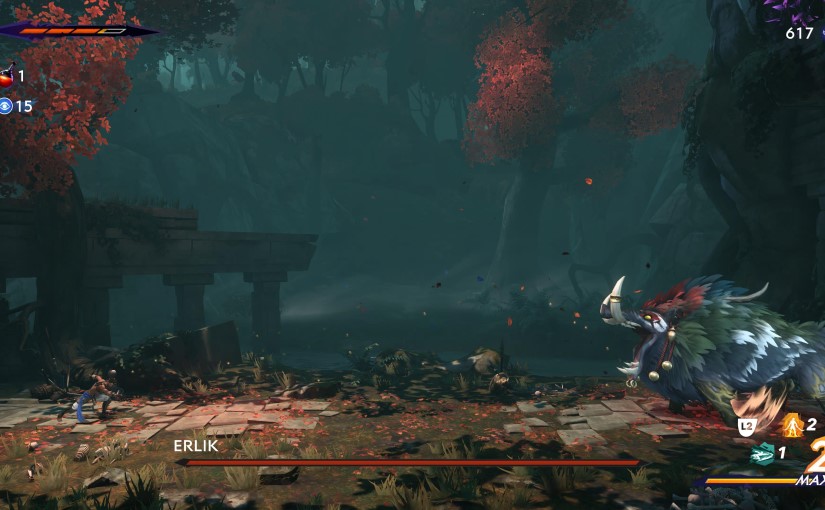
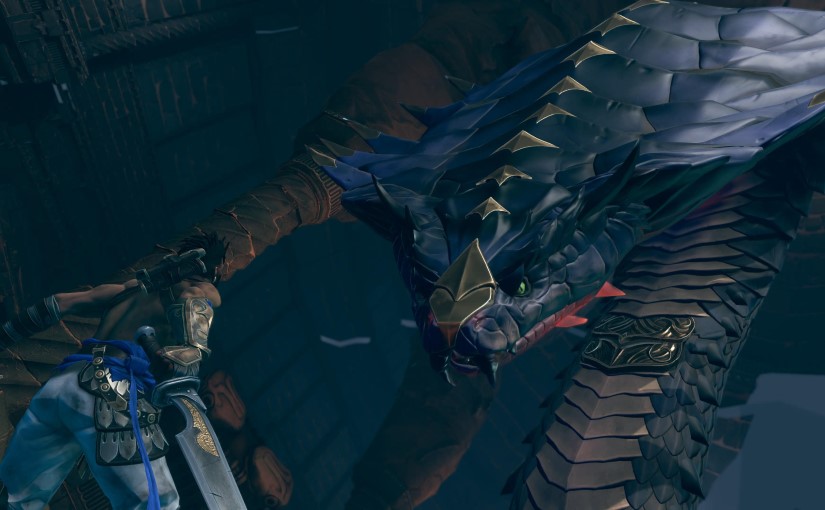
Nope, we got Azhdaha’s seals sorted and she’s definitely a snake! A very big cobra type snake with quite the piercing gaze. It was a pretty cool boss fight that we beat second time, and the big snake spoke to us afterwards. She gave us four special arrows and told us to activate four constellations. We work for the snake now? She showed us where the constellations were on the map and one was right next to us, two more were at high points on the map we haven’t explored yet, and one was miles to the East past the ocean area! How big is this game going to get? Azhdaha also gave us a feather, and her dialogue indicated she kind of just wants all this over with. The feather gave us the double jump. Finally, the fuckin’ double jump!

We met the old man again on our way out of Azhdaha’s lair, and he finally gave his name as Alkara, and then Sargon and I engaged in lots of double jump-enabled exploration. We decided to go after Orod and used the double jump to progress past the tidal wave area, and this led us through a spectacular ship battle frozen in time, with frozen lightning strikes and shattered, sinking ships and everything. It really is quite the spectacle, really awesome. Also, there’s jellyfish.

This path also seemed to be leading us to the aforementioned distant constellation too, but I had to call it a night as I was getting tired. Progress is being made, but I can’t see myself beating it before Ninja Gaiden 4 arrives.

Session 9 – 21st October

For this morning’s session Sargon and I decided to fast travel out of the crazy paused ship battle and do some more double jump exploration in other map areas, and even though I played for quite a while I never ended up going back to go for Orod, so this was one big exploration session.

We revealed more of the relief carving and there are mentions of three princes, and one of them having to die. I now think that Sargon and Vahram are also princes. Princes of Persia, one might say.

I did get a crash, actually, while saving at a Wak-Wak Tree, and lost about ten minutes of exploration progress. I’ve had a few inconsequential glitches, like Sargon floating for a second, floor textures flickering, particle effects staying around for longer than they should, and I possibly think explosions are a little glitchy as a few times I’ve felt like Sargon was thrown across the room after the explosion had cleared. This was my first actual crash though.

We did some more Archive exploration and encountered some really tough platforming and puzzle challenges. In fact, a couple of challenges at the top right of the map felt like such BS that I had to move on. I mean, it’s not like I’m going to 100% the game is it.

We further explored the Upper City after this and encountered Menolias, who was very upset with Sargon. These Immortals need to think for themselves. Towards the end of this exploration session we explored a secret area that’s partway up the main elevator (I got a trophy a while back for discovering it) and engaged in a marathon rotating spiky deathtrap encounter. Our reward was clothes – a lovely new lilac look for Sargon – and that was the end of the session.

Session 10 – 21st October

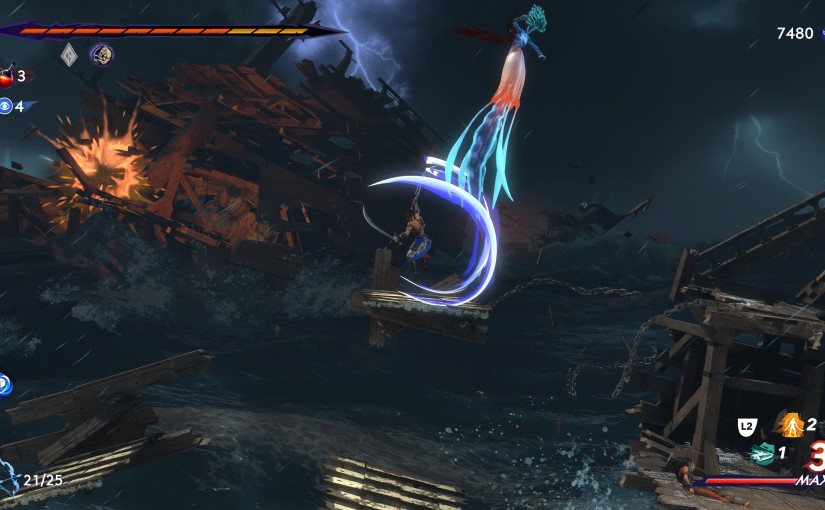
We headed back to the stormy seas for this session. Sargon beat up a time crystal and the ocean started moving again, making the scenery even more awe-inspiring. We met Orod out in the sea and he made a big show, but we beat him first time and it was pretty easy, despite Orod being a flashy fighter. He believed Sargon in the end and then disappeared into golden light. He was just walking around and chatting when he did so, though, so I’m not sure if he died.

The fight with Orod was next to the far-off constellation point that I’d previously mentioned, so we got that one activated. These constellations are also called “Celestial Guardians”, and there were two left, both in the Upper City. That was our next destination.

After plotting some more of the Upper City map we faced off against Menolias near the westernmost constellation point. This fight was way harder than Orod, as Menolias was really difficult to even get close to and had a nasty counter-attack move ready if you did catch up to him. I didn’t keep count, but I’d say it was the fifth or sixth try when we got him. This was the hardest fight yet by far. Just like Orod, he accepted Sargon’s innocence upon defeat, and then disappeared in golden lights. This came across like he died, though, and Sargon even commented on his death. Sad times! He looked like Bard until the end.

Defeating Menolias earned Sargon the ability to teleport to his chakram. I don’t think I’ve mentioned it, but the chakram is the secondary ability of the bow, so this should be a super-helpful ability.

Anyway, slaying two immortals was enough for one session. I might squeeze another session in later.

Session 11 – 21st October

A got another one in! During this session I was distracted by loud children and the fact that Ninja Gaiden 4 had arrived. I need to stick this one out before I let myself go on that one, though!

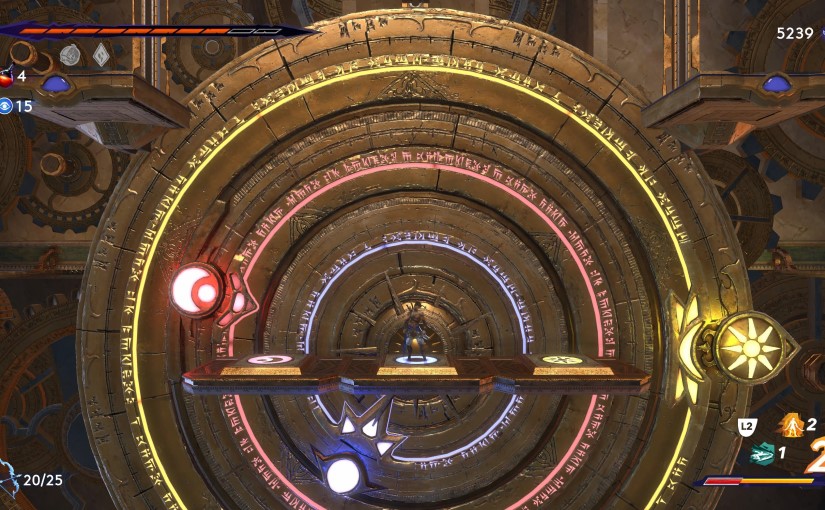
Anyway, Sargon and I headed for the last constellation and came face to face with a fairly elaborate puzzle where you have to use the pocket dimension thing on these pink crystals to activate things and then align a big turning multi-wheel thing. We got past this and met up with Anahita. I’d almost forgotten about her! She said she kidnapped the Prince on the Queen’s orders, and offered to help Sargon but Sargon can’t trust her. There’s no immortal fight before this constellation, just the puzzle and the brief meeting with Anahita. After activating the final constellation the quest log told us to go to the Altar of Constellations so that’s what we did. It’s a place we’ve passed through before.

After activating the altar, Sargon went back in time to when Vahram killed Prince Ghassan and stopped the heinous crime! Anahita got killed instead and past Sargon was confused, but there was no time to explain because it’s a Vahram fight! This is a cool fight as past Sargon helps early on, and Vahram has loads of cool time powers. Got him on the second try.

A cutscene ensued explaining that Vahram is King Darius’ son and the rightful heir, and that Darius was killed by the current Queen. She’s the usurper! That’s why the Simurgh has gone and Persia has had 30 years of drought. However, Vahram has taken things way too far, so he’s still a bad guy too. It’s not over, as he’s still at large and wants all the power. Anahita drifts away in golden light and the two Sargons merge and Sargon gets the grapple ability using his sash (that the Queen gave him). Prince Ghassan is just stood there all like “what just happened?” He says we need to go to the Tower of Silence next to get a key. We’ve been there before. It’s very chilly.

We explored with the new grapple sash ability and found the architect of all these traps and crazy halls. She gave us a quest to complete all of her puzzles around the map but I’ve only done around half of them. For a long time I thought they were something I’d need to come back to but then I worked out a couple of them and realised I could have solved them as I got to them. I can’t remember where they all are though and there are some I can’t figure out. She won’t let me inside her workshop unless I solve all her puzzles. Oh well.

Next we went to the Haven and the shaman woman there had a new item to sell. It was an item that allows Sargon to fast travel between Wak-Wak Trees! This is huge! The previous fast travel statues were few and far between but the Wak-Wak Trees are somewhat plentiful. Getting around is now so much easier.

We found a lighthouse beyond the forest area which had a long and difficult grapple-jumping section to get to it and Sargon fell off (it was my fault). Instead of losing health and respawning, though, he fell down to a brand new area in the ocean section with a giant warship suspended in mid-air!

We also found a hermit somewhere who challenged us to complete an “impossible climb”. I tried it a few times and, well, I can’t disprove its title yet. That was enough for this session. I’ll definitely finish this before I play Ninja Gaiden 4, though. I’ve got to be near the end, right?

Session 12 – 21st October

This was a very late, post Dungeons & Dragons session, but I felt pretty awake so felt like I could make some decent progress. We started by attempting that “impossible climb” again but gave up after a few tries as we wanted to get moving, so we headed off to the Tower of Silence, which was appropriate considering at the time my right ear was playing up and I couldn’t hear anything through it.

This place had lots of sharp ice crystals and spikes and grapple platforming. We finished a side quest here to face all of Ardashir’s lost warriors and fast travelled out to face time-crazed Ardashir himself. He was a pretty easy fight but at least I vaguely remember him from early in the game now. It seems he was the Queen’s general.

Back to the Tower of Silence and we found Farina and bought her map of the place. It’s huge but currently we had to focus on opening a door by sounding three goings. However, we were distracted once again as we finished another side quest, the prophecy one. The finished prophecy was kind of ominous and the carving showed Vahram with four angel wings. Final boss preview, maybe?

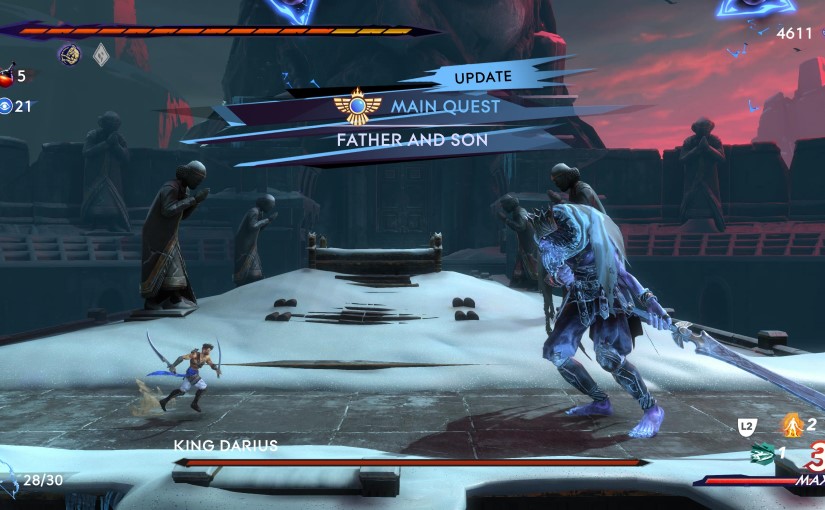
Back to the Tower of Silence again and we found Vahram at the top with the remains of his father, the great King Darius, who we’ve heard so much about in the lore collectibles. Vahram was talking about ascension and stuff, and then he disappeared and his father rose from the grave. Undead king boss fight? Undead king boss fight. It was a cool fight, the late King Darius was very big and had a very big sword. We killed him third try, but the second try was a bust because I was distracted by taking notes for this diary. We got a key for his palace for defeating him, and headed back towards Upper City. Neith was waiting for us. I’d almost forgotten about her! She was worried about Sargon being corrupted by the Simurgh’s powers.

We decided not to go into the palace tonight but we did decide to go for a quick climb. An “impossible climb” some might say. Well, we proved it wrong and succeeded in getting all three magical bells, and all we got was a lousy bit of metal and some background lore about a baby being swapped. At this point it was about one in the morning, so it was time to stop. With a bit of luck I’ll finish the game in the morning and be able to make a start on Ninja Gaiden 4 in the afternoon.

Session 13 – 22nd October

Unlucky Session 13 starts off with some map clean-up. There was one Xerxes coin that Sargon and I were having massive trouble with in the very top corner of the Temple of Knowledge map. It’s in a tiny square area surrounded by spikes with these blocks that fly in from the foreground, and you have to activate these blocks and stand on them without them crushing you, and it can fuck right off.

I watched a video of someone doing it online and it seemed that I was overcomplicating the block summoning with teleportation when I didn’t need to and it was more about timing double jumps. With this information in mind I managed it after another few goes. That left what I thought were two more architect puzzles. I decided to look them up, too.

The one in the Pit of Eternal Sands, well I’m glad I looked it up. It had two crushing blocks and two statues looking over it. I’d messed around previously and thought that maybe I needed to grab an enemy in the pocket dimension thing and sacrifice them with the blocks and it didn’t work. It turns out that you needed to sacrifice a specific statue enemy from the Upper City, which I think was a bit of a stretch to figure out on your own. I mean, sure there are statues watching over the crushing area, but still.

The other architect puzzle I thought I hadn’t completed was the Sunken Harbor noughts and crosses one but it turns out I had. I had no recollection of this until looking it up and remembered you had to use the chakram to finish the row of noughts, and the chest that appeared was a mimic and everything.

With all the architect puzzles done Sargon and I went back to the architect and solved one more neat little puzzle using the map emblems and got inside the workshop! There were a load of lore items and the last health boosting item. I congratulated myself heartily. Well done me.

All that was left at this point other than the final confrontation were a few bits of lore and the platforming and combat challenges in the Haven. We tried one of the challenges once more and I decided we should go and fight a god-powered immortal warrior prince. It would probably be easier.

There were a few more rooms and battles to negotiate beyond the palace doors, and then Sargon finally reached Vahram. He was after the heart of the Simurgh, and he asked Sargon to join him once more. Sargon refused and Vahram merged with the heart and buggered off into time and space. Sargon despaired, but the Simurgh itself spoke to him and told him to accept all his alternate selves as a part of the whole. Sargon still wanted to save Vahram and that gave him strength.

We negotiate one more simple platforming section in a big space/time vortex thing and then it was time to meet with Vahram, god power Tron lines and four angel wings and all. A truly epic fight ensued, and Sargon and I got to his third phase on the first try. The second phase added a giant sword to the mix and the third added a self-cloning ability for big V.

The fourth phase was awesome, as Vahram went super-powered but so did Sargon, enhanced by the Simurgh itself. Once on equal footing, Sargon managed to finish Vahram off. Vahram came to his senses and sacrificed himself to return the Simurgh’s heart, and the game had been completed.

The ending showed Sargon returning with Prince Ghassan. They both left, but not before Sargon exposed the Queen’s murder of King Darius to her people. Then Sargon sat alone by the water and a bird flew down next to him. The reflection revealed that it was the old man, Alkara, before he flew off again. Sargon also mentioned that Orod, Menolias, Radjen, and Varham all died, but I didn’t see Radjen at all aside from a couple of brief early encounters. What’s going on there then? Post-game content? 

The post-credits stinger showed that Neith and Artaban had brought the child version of Vahram back from Mount Qaf and promised to raise him well and look after him, and then Sargon rode off. So he wasn’t a prince? Were the three princes in the prophecy Ghassan, Vahram, and young Vahram? Who was the switched baby? Have I played as a Prince of Persia or not?

Anyway, this game was great and I’d recommend it to anyone. Bastard hard at times, but mostly in optional sections. In a way, I’d say it’s the opposite of Metroid Dread, in that the really tough bits in that were the bosses, whereas the boss fights in Prince of Persia: The Lost Crown are like days off compared to some of the platforming. The only boss I had any real trouble with was Menolias.

Anyway, like I said, this was a fantastic game, and was a great introduction to the Prince of Persia series for me. Am I going to play any more? Probably not, but that doesn’t mean I didn’t like this one.

The Ooze – Retro Review

It’s Slime Time

An oft-forgotten monster type in the preternatural pantheon (unless you’re a fan of JRPGs or Dungeons & Dragons, that is) is the humble ooze or slime. These corpulent masses of gelatinous gunk used to be a mainstay of the big screen in the era of B-movie horror, with Steve McQueen’s The Blob leading the way and such masterpieces as X the Unknown and Caltiki – The Immortal Monster also getting in on the sentient slime action.

Not to be outdone, Sega Technical Institute came up with the idea for a 16-bit video game with a focus on vengeful viscosity, offering ’90s kids the chance to live out every gamer’s dreams of becoming a formless, quivering mass of repulsive goop. They unleashed The Ooze in 1995.

The game is at its most entertaining when you’re slithering through cramped areas and Dr. Caine’s form assumes the shape of its surroundings.

The game kicks off with a simple cutscene detailing the dramatic story of how the titular ooze came to be. A scientist known as Dr. D. Caine uncovers a plot at a chemical plant involving an evil corporation unleashing a toxic gas amongst the populace and then making a killing selling the serum that cures its effects. Shocked and ashamed, as Dr. Caine was the one who invented the gas, our hero tries to put a stop to the corporation’s nefarious plans, only to be captured, injected with gunk, and disposed of with the rest of the sludge. The bad news for the bad guys is that Dr. Caine survived, gained a new, goopy form, and is out to stop their schemes and regain his humanity.

This schlocky set-up results in a top-down action adventure in which players are responsible for guiding the puddle that was Dr. Caine through a variety of levels, slapping various enemies with extendible, gooey tendrils, and utilising goop-spitting attacks to clear the way. As the ooze comes into contact with environmental hazards or enemy attacks the puddle will shrink in size, with Dr. Caine’s adventure coming to an untimely, slithery end if the puddle gets too small or his goopy head takes too many hits.

Dr. Caine’s fate is actually pretty brutal when you think about it.

Alas, controlling this bilious mass is a mixed bag. While it’s fairly satisfying to slither around and squeeze our slippery hero through gaps and around terrain, the choppy animation and lack of visual clarity as to Dr. Caine’s status do detract from the overall experience. It can be difficult to tell just how close our oozy hero is to expiration, resulting in some surprising game overs, and discouraging use of Caine’s slime spit attack as it takes away from his sludge reserves.

When it comes to presentation, The Ooze isn’t one of the Mega Drive’s finest. Sega Technical Institute, an American branch of the Japanese giant, were also responsible for Sonic the Hedgehog Spinball, and some similarities in the music and visual style are apparent, but that game is much more aesthetically and aurally memorable than this one. If The Ooze looked and sounded more like Sonic Spinball’s toxic caves opening level, it might have lingered longer in the minds and hearts of gamers, but it was not to be. Instead, The Ooze is a little bland visually and, in the earlier stages at least, looks strangely reminiscent of Bitmap Brothers’, The Chaos Engine, although less coherent in its artistic vision.

The Ooze got a fairly negative reception upon release, but this seems a little unfair. It’s an interesting game that’s entirely unique on the console. Moving the goopy protagonist around the stages is fun in its own way, and slurping up goop dropped by enemies to further bolster our hero’s mucilaginous form is a satisfying mechanic. The team at Sega Technical Institute had some great ideas, and for the most part, they implemented them well, but it just needed some additional polish and personality to take it to that next level of quality.

The game is actually kind of hard. You might find it easy though, being such an expert and everything.

It’s a tad expensive to pick up a complete copy nowadays, but if you do find the concept interesting and can play The Ooze through other means, I recommend giving it a go. You should at least have a decent amount of fun enveloping the minions of the evil corporation in your slithering, overwhelming, coagulated, quivering folds. That’ll show ’em ooze boss.

This article was written for a now-defunct Sega magazine and never used. Played on Mega Drive via emulation.

Shadow of the Ninja – Reborn

Blue Shadow (And a Pink One Too)

A modern remake of a “Nintendo hard” NES game that I’d never even heard of? No, it’s okay, I’ll leave it, thanks. What’s that? It’s got gorgeous, pixelated sci-fi cityscape backgrounds and super cool modern re-imaginings of 90’s ninjas and robotic enemies? Alright, you twisted my arm.

Shadow of the Ninja – Reborn, developed by Tengo Project, is a modern remake of the NES title Shadow of the Ninja, known as Blue Shadow here in Europe. It features two ninjas of the Iga clan, Hayate and Kaede, as they navigate six distinct stages in a direct attempt on the life of the evil Emperor Garuda, whose forces have taken over the United States of America.

There’s a bit of Contra in there, a sprinkling of The Ninja Warriors, and perhaps a slight bouquet of Metal Slug.

This re-imagining updates the visuals in bombastic style, with chunky sprites filled with personality, a grimy tech aesthetic juxtaposed with neon lights and splashed with delightfully garish, luminous colours, and fluid animation bringing bosses and set-pieces to life.

It’s a gorgeous-looking game, but you won’t have much time to take in the sights, as beyond a couple of basic grunt-type enemies, most of the mechs, monsters and mooks you’ll face are perfectly equipped to catch out sightseers and careless wanderers. Shadow of the Ninja – Reborn is challenging, and I can see how the original might have been a very tough nut to crack. This remake allows players to continue indefinitely from the last stage reached, but most areas still took me a lot of tries to get through, and the bosses take the difficulty up another few notches, forcing the recognition and memorisation of some devious attack patterns.

Both Hayate and Kaede control exactly the same, and can attack, crouch, jump, and attach themselves to walls and ceilings, flipping up onto higher platforms if the terrain allows. They both start off with a katana (that can be powered up to launch projectiles) and a kusarigama, which is basically a blade on a chain. The kusarigama packs a punch and can attack at range, but its longer attack animation will leave its wielder vulnerable and, unlike the katana, it cannot deflect enemy projectiles. As the game progresses, it becomes necessary to fully understand the strengths and limitations of each weapon to succeed, and knowing which attack to use and when so as not to leave yourself vulnerable to counter-attack is the key to success.

The heads fly off of these cute little laser horses when they take damage, resulting in a flying head drone and some charging, disembodied legs to deal with.

Successful players will also have to master jumping, as Shadow of the Ninja – Reborn features a few fiddly jumps here and there. The jump button has a slight delay, and this has led me to more than a few health-sapping plummets into nothingness. Luckily, falling off the screen isn’t an instant death, but the jumping is the most unsatisfying part of the game for me, and I feel like it could have been a lot smoother. The ninjas also have the ability to momentarily hover, and this is activated by pressing down and holding the jump button, which was a little too fiddly for an old and decrepit gamer like me at first. It all clicks into place eventually, but not before more than a few frustratingly missed ledges.

The “ninja gear” mechanic adds another element to the game. Throughout each stage crates will regularly hide limited-use weapons – including firebombs, larger swords, and even guns – that can be kept in a limited inventory and brought into action when they’re needed. There is a system where players can purchase unlocked items of gear to start the game with, which is definitely helpful in certain situations, but this starting gear is lost upon death, so if you’re having trouble with, say, the fourth stage boss, and purchased some gear you thought might help you with it, you better hope you get there without continuing.

If you repeatedly die on a certain stage, Shadow of the Ninja – Reborn will start to take pity on you, packing extra health-restoring goodies in your inventory like a proud ninja mum. I have no shame in admitting that I made use of these pity dumplings on numerous occasions. I did find myself getting better at the game, however, and was breezing through the formerly-difficult early stages upon a second play-through. The later areas could still be a bitch, though.

There’s also a two-player co-op mode, which I imagine is great, but I haven’t talked the daughter into trying that out with me yet.

This boss was really tough until I realised I could bash it in the head with a sword. It … wasn’t clear at first, okay?

Shadow of the Ninja – Reborn is a great retro platformer-action game with fantastic visuals and satisfying combat, that’s let down slightly by some occasionally fiddly jumping. It’s a stern test of reflexes, pattern memorisation, and patience, but if you think you’ve got the ninja skills, then I’d highly recommend taking a trip through this extremely dangerous neon metropolis.

Played on Switch

Record of Lodoss War: Deedlit in Wonder Labyrinth – Game Diary

Record of Lodoss War: Deedlit in Wonder Labyrinth is a Metroidvania game developed by Team Ladybug and released in 2021 across multiple formats. I picked up a physical copy of the game for the Switch because I thought it looked cool and also because I own a copy of the Dreamcast RPG, Record of Lodoss War

The following is a spoiler-filled account of my time with the game, with some opinions and observations sprinkled throughout.

Session 1 – Tuesday 17th September

After a short break following knocking Visions of Mana on the head, it was time to play something a bit different. Record of Lodoss War: Deedlit in Wonder Labyrinth was sitting on my shelf, and I fancied a Metroidvania. I’ve never watched the anime, I’ve never read the book, and I’ve played Record of Lodoss War on the Dreamcast but barely remember anything about it. I’m also quite inexperienced with Metroidvanias (I’ve finished Metroid Dread and that Shadow Complex game on Xbox 360 and that’s about it) so this will definitely go well. Let’s go!

Right, the whole thing has a nice pixel art style (even the title screen and the developer logos) and I was treated to a minimal intro explaining that Deedlit and a group of heroes once saved the island of Lodoss, and Deedlit fell in love with one of them. She woke up in a stone circle not knowing what was going on, and control was handed over to me. Six pages of tutorial text later and it was time to adventure.

A few first impressions; the game looks very pretty, Deedlit is really nicely animated, and the music is pretty cool. The controls seem precise, and the directional attacks are fun to pull off. The game started in the aforementioned stone circle, and Deedlit and I thought we’d be traditional and headed off to the right.

Our first enemy was an imp, which we stabbed with our sword, and it dropped a spear. Deedlit equipped the spear and we moved on. There are barriers and locked doors in the next few areas that we’ll have to come back to, and enemies respawn when you go back into a previously cleared area. There’s a dice theme going on, with enemies having a pair of die displayed under their health bar, but I don’t really get it. I should have read those tutorials.

We soon found Sylphid … I mean Sylph (still thinking about Visions of Mana), which is a wind spirit that gives Deedlit wind moves and allows her to hover. We then found a statue of Marfa, who is a goddess, apparently, and this allowed us to save and regain health. That was all the Metroidvania basics covered, now it was time to go and hover somewhere.

We passed by the stone circle again and Deedlit saw someone called Parn, and then a sorceress-looking woman appeared (whose name I didn’t catch) and asked for Deedlit’s loyalty. Deedlit refused and the sorceress said something about “trials”, and mentioned that another lost soul is coming and that it will be interesting to see who gets their wish first. A while after this, there was a small underwater area, and it became clear that Deedlit cannot hold her breath for long at all.

We found a fire spirit next (called Salamander, not Salamando) and now Deedlit can swap between fire and wind modes. There’s a mechanic where you can fill up your fire and wind spirit gauges if you don’t get hit. The more full each gauge is the more damage that element of attack will do, and if one or both are completely full, it’s possible to gradually regain health. You can also absorb attacks of the same element.

Moving on, we found a place with a big, hanging, half-eaten dragon flank and hitting it caused quite a bit of slowdown (and filled the spirit gauge). We found a bow next, and Deedlit seemed to be getting kitted out pretty early. We found some spirit magic pretty soon after this, and could use some magic points to shoot a load of balls of light at enemies. Handy.

We bumped into someone called Slayn (this was, like the sorceress earlier, preceded by a kind of video glitch effect). Slayn was all vague and then he ran off. Deedlit seems to know these people but they clearly aren’t being themselves. Poor Deedlit, she must feel very isolated. She met someone called Ghim next, and he was acting weird and evasive too, but appears to be the game’s merchant. We couldn’t afford anything from him that looked good, so we moved on.

After a bit more Metroidvania-style progress, we encountered a large, snake-like dragon called Abram the Blue. Again, Deedlit seemed to recognise the dragon and tried to converse but he was hell-bent on throwing down, so we obliged. We took him out first time, and Deedlit got a Soul Crystal Ball, but we don’t know what it’s for yet.

We soon found a snake statue that granted Deedlit the ability to slide, which enabled us to explore another area through a low gap. We met a Dark Elf girl called Pirotess (Deedlit called her this but she didn’t like being identified as such). She killed us. She was quick and tough, repeatedly leaping and throwing knives. We then fell to her a second time, and I was realising that I probably needed to stop taking this game lightly now. We got her the third time. She wasn’t dead, though, and she nicked our soul orb thing before she legged it, which was very rude.

Progressing to the next area after this fight led us to “Stage 2”, which had a different vibe and a background theme that kind of looked like the inside of a great hall that’s seen better days. I felt like we’d missed stuff, so we backtracked for a bit, but the only unexplored areas I could find seemed to still need other items or keys to get to. We went back to the Stage 2 area and got killed very quickly by some nasty bird-type enemies. Things were getting real in Stage 2, it seemed. Axe-throwing kobolds, goblin archers, and big, angry birds were absolutely everywhere.

We got the video glitch again (which I now realised flashes up a large eyeball thing) and Deedlit met someone called Woodchuck. This guy seems to offer a gambling mini-game. I’m good, thanks. This last bit of progress marked the end of Session 1, and the now-traditional wall of words this entails. I’ll try to keep the entries shorter, but I can’t promise anything.

Session 2 – Tuesday 17th September

I was excited to get going again with session two, and Deedlit immediately fell into some spikes and died. We will not be discouraged! She then died in spikes again because I pressed the wrong button, and then she died again moments later because I got knocked into spikes by a giant centipede enemy, and I decided that I’m going to stop keeping count of her deaths at this point. The Stage 2 area can very appropriately be called a difficulty spike.

After some cool sections where Deedlit needed to bend her arrow shots using magnets, we encountered a boss fight in the form of a couple of Djinn type creatures, one wind-based and one fire-based, and the fight required Deedlit to use her element-swapping powers to avoid and dish out damage. We beat these guys first try, acquired the double-jump, and encountered a character called Etoh. She too, is vague and unhelpful.

After a bit more exploring the game crashed on me while trying to use one of the fast-travel points. Luckily, everything was fine when I reloaded, and I’d saved moments before.

Upon reloading, Deedlit and I made some really good progress, exploring past some green doors (because hitting one green switch seemed to open all of them) and finding a better melee weapon, but then got absolutely shafted upon returning to one of the larger rooms by a combination of charging skeletons, pixies, kobolds and spikes. We lost a lot of progress, but that’s Metroidvanias for you.

We found a power-up for the wind spirit attacks next, and then did a bit of double-jump led backtracking and found a room with four intimidating dog statues. There wasn’t really anything here and the dog statues didn’t come to life. Maybe next time. Some more backtracking saw us find a power-up for the fire spirit attacks. It’s nice to feel powered up.

We stepped into another obvious boss area (they’re marked by a green haze leading into them) after exploring most of Stage 2, and the sorceress (who Deedlit called Karla) returned. She said some stuff and then we had to fight a gigantic red dragon called Shooting Star. That’s a very cute name, but it was a very tough fight, with a green poison attack and a green orb-firing attack proving especially hard to dodge. This took three or four tries, but we got it in the end, and were led into Stage 3. This is another outside area with a misty wood in the background. I liked it. It was filled with plant-type enemies and we also spotted some harpies and zombies.

We found an appropriately sneakily hidden invisibility spell and scouted out a save point, and it was time to end the session. I had to go and get some pizzas for me and the youth because, sometimes, pizza is all you need.

Session 3 – Tuesday 17th September

At the start of this session, a ghostly man turned into a key. It was the soul of a thief, apparently, and it is supposed to open a locked door. Not the one right in front of it, though. A little further on Deedlit and I found an MP boost behind a cracked wall, and we realised we’re going to have to really keep our eyes peeled for those secrets.

We found a boomerang weapon and it’s got great damage and great range. How are we going to ever go back to a regular old sword now? Incidentally, it’s worth pointing out here that even though I’ve never played any of the Metroidvania style Castlevania games (I’ve only played Castlevania: Lords of Shadow and its sequel), Record of Lodoss War: Deedlit in Wonder Labyrinth definitely leans more towards the “Vania” half of the Metroidvania genre. Deedlit even leaves those shadowy echoes of herself as she moves around, just like the effect in Castlevania: Symphony of the Night.

Deedlit and I found a long, nicely furnished hallway area filled with zombies and demons, all of whom were easily slain with our new boomerang. We also met a new enemy called the Lesser Dragon, and this is clearly the creature that’s been slaughtered and hung to make the meat that we keep finding around the place. They’re annoying so I don’t feel bad for them.

At the end of that hallway we found the switch that opened the yellow doors, making a fair amount of new areas accessible. We checked a suspiciously blank area on the map and found a water spell that causes a cascade of water. We also encountered a creepy, shadowy enemy called a Shadow Stalker, that only becomes corporeal when Deedlit is looking away. Lobbing boomerangs and then looking away before they come back catches these shadowy fellows out, but I’m not sure how we would’ve dealt with them if we didn’t have the boomerang.

We fought some Medusa enemies with bows, who kept turning Deedlit to stone and then shooting her with arrows, and then we found another ghostly figure who gave us a key. This one was a craftsman. Deedlit then overheard Karla and Pirotess talking about reviving Ashram. I don’t know who Ashram is, but he or she sounds like bad news. Pirotess swore loyalty to Karla and Karla gave her a magic sword. We found King Kashue next. Deedlit seemed to recognise him but the familiarity was not mutual. I think he’s probably nuts (because Kashue sounds like cashew … never mind). He was as vague as everyone else and mentioned an archery training range just past him. We tried it and got an F.

Next we found a ghostly sorcerer with a key, and I wondered at this point if these are Deedlit’s pals as this guy looks familiar. A big hexagon shape in the floor had a message saying we don’t have enough keys, though. A little later, we encountered some bug-looking enemies that made the area around them dark until we smashed them. Then we found a ghostly priest with a key, and I’m pretty sure it was Etoh, so I definitely think these guys are Deedlit’s pals.

There was a fight against Karla herself next. Somehow, we got her first try, but then she transported us to a void and made us fight a female, Templar-looking warrior called Flaus. This chick killed us twice, but we got her the third time. There was no explanation after this battle as to who she was or what she had to do with Karla. We got a knight key off of a knight apparition afterwards, and this meant we could activate the hexagon. As we did so, we received an ominous message about descending into the abyss. Alright, calm down, Nietzsche.

There was another boss fight pretty soon after this, and it was Karla again followed by a horned, winged female with armour called the Demon God who summoned wolves that were seemingly made of blood. We managed to survive both of these fights on our first try, and Karla said some more vague nonsense before fleeing.

The next area is identified as Stage 4, and it has a sandy ruins feel and there is rock music playing! We found a spell called Wind Storm, and on the way to picking up this spell we were forced to fight Goblin Shamans and Valkyries. What an odd combination. Why are they teaming up against us, eh?

In a random cavern a little while later Pirotess seemingly killed Parn and Deedlit vows revenge. I wonder if Parn is the guy you play as in Record of Lodoss War on the Dreamcast.

The difficulty has really spiked again here in Stage 4, with Minotaurs, death scorpions, soul-firing mummies and flying lizard everywhere, often placed in really annoying and awkward locations. I was planning to finish up soon, but we did manage to find the underwater breathing item, and quickly nipped back to a previous area of the map using the fast travel doors to find a shadowy magic spell beyond a waterlogged section I’d noticed long ago.

That small, crocodile-killing victory was enough for the night, and the third and final session of the day came to an end.

Session 4 – Wednesday 18th September

I started up this session forgetting that Record of Lodoss War: Deedlit in Wonder Labyrinth had actually gotten really difficult lately. Just seeing the sandy brick décor of the ruins I loaded into reminded me, though.

We went straight into a boss fight, just to compound this feeling, and this one was with a huge black dragon called Narse. In the brief exchange before the fight, it was clear that Deedlit recognised this guy, too, but she didn’t seem to expect to be friends with him, like the other dragons. Some things the dragon said possibly implied that Deedlit is stuck within her own mind. Is this whole labyrinth a metaphor?

Narse was a pain in the arse. It took many deaths before Deedlit and I finally slew him. We knew what we needed to do, it was just easier said than done to do it. Narse had a really annoying attack where he’d create alternating screen-high walls of fire and wind power and zap Deedlit with pink lasers, and it was really giving us trouble. We were gradually getting the hang of avoiding it each time, but when we actually beat the dragon we managed to pile on enough damage to drain his health bar before he entered that phase.

Beyond Narse was the button that opened the red doors. We went through a nearby red door and found some new rooms, and we spotted Pirotess in a save room. I found my self using a tactic I’d used before here, where I’d been taking advantage of the quick room transitions and respawning enemies to farm spirit gauge. It’s viable but it can slow the pace a bit.

We quickly came to another boss fight, and sure enough, it was Pirotess again. It was another tough one, Deedlit fell many times, but we got her in the end. I like the bosses in this game. They really start to ramp up in difficulty after Stage 1, but if you get killed, you always feel like you can beat them if you try again. It’s easy to retry thinking “next time I just need to do this differently” and eventually, something will work and you’ll achieve victory. It’s good, and I’ll maintain this opinion until I get to something I can’t beat later.

Some story developments occurred after this battle, as Pirotess seemed to use her life force to resurrect Ashram. The camera cut to a spooky throne somewhere that looked like it had the opening area’s background, and a scary, warrior-king-looking fellow appeared on it. Ashram, I presume? After this, Deedlit woke up in what might have been her house with all of her items and abilities (save the rapier that she started the game with) missing. There was a sword in a nearby cabinet called “Heritage” that Deedlit could pick up and equip, but upon slashing it she’d go through a very long animation of trying to heave it back up. Symbolism? I don’t know enough about Deedlit’s lore to be sure.

There were enemies outside the house called Lifeless Kings that looked like reapers crossed with sorcerers. Deedlit could only do scratch damage to them, so we decided to run past them, although this was easier said than done as the last one was very annoyingly positioned. Deedlit’s pals were beyond this area, but they looked all desaturated and faceless. They would turn around whenever Deedlit walked past them, implying that she couldn’t look at their faces. Standing next to them made them disappear, and then Deedlit woke up in the boss arena again.

Moving on took us to Stage 5 (every time there’s a new stage a six-sided die is used to show the stage’s number, so I’m assuming there will be six total) and it has a grand mansion vibe with spooky green flames in the fireplaces and on the candlesticks. Sometimes this game really reminds me of Rogue Legacy, visually at least. That’s a Roguelike, not a Metroidvania, though. The first enemy we encountered here was a large griffon, but we didn’t get far before I had to save and quit. Other responsibilities were calling.

Session 5 – Wednesday 18th September

I had a late session tonight accompanied by some chocolate digestives. Deliciously sustained, Deedlit and I dove into the new Stage 5 area. New enemies types found here included; claw beasts (pale lions that never landed a hit on us once), earth magic-flinging gnomes, and giant spiders who skittered around rather creepily on the back walls. Incidentally, I found that Deedlit could now handle the aforementioned “heritage” sword with ease, but only because we’d found a better sword, as well as a handy homing bow.

I had another game-closing crash following fast travel after this. Like last time, a reload solved it and I’d saved moments before. Annoying but not game breaking.

A little more progress resulted in us finding another boss room and a bit more video tape fuzz. This time we were greeted by a cloaked, armoured guy who introduced himself as Beld. Again, Deedlit seemed to recognise him, but she called him Emperor Beld. He didn’t know anything about being an emperor, but he liked the idea, and a fight ensued. We beat him first time. I wasn’t expecting that this late into the game.

He caused a cave-in upon defeat, and Deedlit was unable to backtrack. In the next area we encountered a creepy, wooden soldier that repeatedly reanimated itself after we slew it. At first I thought it was scary, but then I realised it was a walking spirit gauge farm. After fighting this thing for a while we found the super flying double-jump item in order to gain even more height.

Following a spider and dryad infested climb Deedlit encountered Pirotess again. I thought she was a goner! She recited some more dialogue that hints at the “this whole thing is a dream” theory, and also hinted that Parn isn’t actually dead. Not that I thought he was. A very fiddly spike-filled room followed this, featuring elevators that we needed to operate by firing arrows at cog wheels, but once we got through those we found ourselves back around the area where we couldn’t backtrack due to Beld’s antics, and Deedlit and I did some exploring with the new extra jump height. We located a firestorm spell and a dryad spell.

Getting back on track, we quickly found another boss room, and Ashram was sitting on his throne in the background (although I could have sworn this wasn’t the room he appeared in during the cutscene). He stepped down and we fought, man to elf, and he had similar moves to Beld but was much tougher. We got him the third time with liberal use of the dryad spell, but he then puked green stuff and turned into a strange, green-coloured jade golem-looking thing. Deedlit was killed very quickly.

This second fight was even tougher, and every time we died we had to fight the first phase again. Luckily, we’d gotten the hang of the first fight, and handled it pretty well almost every time, but it still took us a lot of tries to get that second phase. This was a fucking tough fight. Once we finished him off, Pirotess reappeared and told Deedlit that she loved Ashram, before fading away. Looks like Deedlit and Pirotess were two sides of the same coin.

Parn appeared not long after this and led us to the purple door switch and a nice new bow. It was a dead end, though, and he’d disappeared, so definitely that whole dream theory is getting more and more likely.

I could’ve kept going, but I’d spent a lot of time on those boss fights, so it was time for bed.

Session 6 – Thursday 19th September

The die rolled six, and Deedlit and I entered Stage 6 to start this session. This next area had a semi-creepy, dark temple feel mixed with an almost technological vibe evoked by green, cuboid lights and dark stone patterned with straight lines. Weirdly, it reminded me of the alien base in Subnautica. There was also some cool, synthy music here.

There were lots of scary monsters for Deedlit to plough through; colour-changing dragon things, huge basilisks, nearly invisible dudes, and the return of the lifeless kings. This area was more of a simple monster rush than a maze. We got through it, and found the switch for the light blue doors. I noticed that there were no fast travel doors in this area so far. We still did a bit of old-fashioned backtracking and managed a very fiddly jump through different-coloured forcefields to get a not-all-that-great bow, though.

Back to the task at hand, and we met Karla again in another boss area. This time, she kicked off a boss rush! Abram, the two djinns, Shooting Star, Karla herself, Flaus (the Templar-looking woman), Demon God (the winged woman), Narse, Pirotess, and that’s as far as we got the first time. We went again, and got a bit further. Beld and then Ashram followed Pirotess, but Deedlit was killed again because I pressed the wrong button when trying to drink a potion while fighting Ashram.

We were stuck here for a while. Annoyingly, despite beating him easily when we met him earlier, and getting past him the first time we met him in this boss rush, too, Beld was proving to be the roadblock with his variety and combination of attacks. Luckily, one of Ghim’s shops was nearby, and we blew our Lodoss bucks on a load of HP and MP potions. It was the first time we’d held more than one potion.

It didn’t happen straight away, but soon we defeated Beld and Ashram, and the last fight in this hectic rush was gooey green Ashram, who we took down without issue. That whole boss rush felt pretty awesome.

The next room finally had a fast travel door (not that we used it – I was satisfied I’d found everything I was going to) and then beyond that was a section with extra-strange architecture and some trippy music. Deedlit experienced some haunting encounters with her pals in this area, all of whom said something strange, and a mysterious voice was speaking about Deedlit choosing to stay in this world. This whole area was like a spiral, and there were no monsters.

It looked like the final boss was going to be in the centre of this spiral, but we bumped into Parn first. Deedlit remembered at this point that Parn lost his life years ago. Wow. I could’ve done with that information. If I was a Lodoss enthusiast, would I have known that Parn had been dead for years? Whatever this version of Parn was, we had to fight it, and throughout the fight it took on the forms of all of Deedlit’s pals. It was a pretty easy encounter, though, and we were victorious first time.

The background changed at this point, and a huge, creepy, greenish statue (of Parn, I assume) raised up. Deedlit rejected it and it fell, and a huge eyeball creature emerged. It was the creature from the title screen and the one that briefly appeared in the video glitches. The energy bar called it Nihil.

This was another somewhat easy fight. While it did have some potent attacks that were hard to dodge, it was very easy to keep pummelling it with the water or light magic spells and keep one or both spirit gauges full so that Deedlit’s health would regenerate. I don’t remember even using a health potion, but we may have used one.

The actual Parn seemed to appear after this, and Deedlit had some words of endearment for him, then she disappeared. She woke up in the same house that she woke up in earlier in the game, but it was much brighter this time and the music was a lot friendlier. I was able to control Deedlit again and moved her outside, where she met a person called Leaf. Deedlit began to tell Leaf about all the people she encountered in the labyrinth but because Deedlit also encountered them all in real life, Leaf just thought she was talking about that and told Deedlit that “everybody knows that stuff.” Not me. I didn’t know any of that stuff. Maybe if I had I would’ve known that Parn had died years ago!

Deedlit and I continued through this pretty area with lots of birds and trees and a couple of nice, rustic buildings, and we eventually found the stone circle that the game started in (it momentarily shows the stone circle as it was at the start of the game; all dark and spooky). Deedlit seemed to finally come to terms with Parn’s death, and the credits rolled.

There is a quick post-credits scene where a young lad was in the woods calling for Deedlit. He said that she was needed because “an age of war has come to Lodoss once again”, but then a strange sound was heard and he fell to the ground. Deedlit found him and knelt next to him, and “The End” was displayed in the same spooky, green text that the game over screens have used. I have no idea what any of that is all about.

Well, I enjoyed that. It was nowhere near as complex as Metroid Dread, and much more combat focused, but it was a fun game to blast through and a nice-looking one, too. I don’t think I’ve been inspired to look into the greater franchise, but you never know. A Boss Rush mode was unlocked upon completion, but I think I’m done with Record of Lodoss War: Deedlit in Wonder Labyrinth.

I’m glad I made the journey through Deedlit’s grief-fuelled dream labyrinth, though. She has some cool boss fights floating around in her head.

***

Some additional info; I read up on the story behind Record of Lodoss War: Deedlit in Wonder Labyrinth later in the day, and found out that not only Parn, but all of Deedlit’s companions that we see throughout the adventure had died long ago. Deedlit has presumably outlived all of them due to elves in the Lodoss lore being immortal or long-lived like Tolkien’s elves. This explains why she is greeted by a character called Leaf at the end of the game, and not Slayn or Etoh or Woodchuck or someone. This gave the whole game a much more sobering tone, looking back, and Deedlit becomes an exceptionally sympathetic character.

I also learned that in the aforementioned Dreamcast game, Record of Lodoss War, you do not play as Parn, and instead play as a nameless hero resurrected to oppose an evil god. The story of that game has little to do with the greater lore of the franchise, it seems.

Sorry to any Lodoss aficionados reading, but at least I’m learning!

Into the Breach

Live, Kill Kaiju, Die, Repeat

As someone who’s eyes light up at the sight of a grid-based battlefield populated with adorable 2D combatants, I was predisposed to give Into the Breach a chance. If you’re not like me, and don’t instantly fall in love with anything that bears even a passing resemblance to Shining Force III or Final Fantasy Tactics, you might glance at the relatively small battlefields and limited number of units on show and decide to give this one a miss. I’m here to politely request that you reconsider that decision, as you’re missing out on a gem! A bastard-hard and thoroughly depressing gem, but a gem nonetheless.

Despite this guy’s confidence, you won’t be able to save everyone.

This indie-developed, mech-on-kaiju strategy game has been around since 2018, but I recently picked up the physical copy on Switch, and have found myself thoroughly absorbed into its time-bending, apocalyptic world. Your job in Into the Breach is to command a small squad of mechs as they attempt to defend the world’s population and infrastructure from an onslaught of giant bugs known as the Vek. Already on its last legs due to various natural catastrophes, civilisation has been brought to the brink of destruction by the marauding kaiju, and humanity’s last hope comes in the form of a group of time-hopping mech pilots.

The main aim of the game is to protect buildings and facilities from monster attacks, as these locations provide power to your power grid, and if your power grid fails, the timeline you’re in is fucked and it’s time to bail out. If this happens, your pilots will use their timey-wimey powers to zap themselves to a different timeline and try again. Each pilot is scattered across different timelines, too, so you can only keep one of them, and if you mess up and one of your mechs gets destroyed, the pilot is (usually) gone for good. Just don’t get too attached to these guys, okay?

While Into the Breach has a lot of the gameplay and strategy you’d expect from comparable modern retro tactical games like Triangle Strategy and Wargroove, there are a few mechanics that handily set it apart. One is the previously-mentioned timeline shenanigans, which lends itself to roguelike-style progression where repeated failures result in you being slightly better-equipped to take on the next timeline. Another mechanic that sets Into the Breach apart is the fact that it will clearly tell you exactly what the monstrous Vek are planning to do in the next turn, and will allow you to plan and manipulate them appropriately.

Chemical pools and conveyor belts are just a couple of the environmental hazards you’ll be dealing with. Oh, and see that knobbly squid thing in the bottom row? Take that out first.

It may sound like being able to accurately predict the AI’s every move would make a game like this pretty easy, but this is not the case. In fact, it’s this mechanic that takes Into the Breach further into board game or puzzle game territory. This removal of random chance or behind-the-scenes calculations makes Into the Breach pure strategy, akin to Chess, and will lead to difficult decisions aplenty. Expect to find yourself staring at the screen for minutes on end, sighing and rubbing your chin as you attempt to run through sequences of moves in your head to get out of a seemingly impossible situation you’ve found yourself in. You’ll often find yourself played into a corner where you’re forced to sacrifice something, and making the difficult choice between the mission objective or one of your experienced pilots is sure to produce lots of curse words and require a cup of tea or two. You’ll need a strong stomach, thick skin, and a really, really big brain to master this one.

The final goal of the game is to defeat the Vek at their hive, which is an area that opens up after liberating two of the four available islands. The difficulty scales as you progress through the islands, so taking the Vek hive out after island number two is your easiest option, but successfully completing a four-island run is a much more difficult goal. It’s a tough ask, and only letting you take one pilot with you to the next timeline feels harsh to the point of being insurmountable. Perseverance, experimentation, and the ability to stay calm and look for options under pressure are your best weapons to get there.

It’s often better to let your mech take a hit, rather than lose some of your power grid. Even if a pilot is killed, the mech’s AI will bring it back for the next mission. You’ll probably feel bad, though.

Once you’re up and running, understanding and upgrading your mech’s abilities, manipulating the Vek into harming each other, and successfully shielding civilians from kaiju attack becomes extremely satisfying. You’ll feel like a legendary commander when you pull it off, and you’ll become more confident as you start to understand the game’s way of thinking. However, Into the Breach is always capable of surprising you, and a power grid failure that results in hordes of titanic bugs burrowing out of the Earth’s crust to overwhelm the planet’s last defenders is always only a mistake away.

As alluded to earlier, Into the Breach can initially seem limited. The maps are small, you’re usually in charge of only three units at a time, and there are only five different environment types to do battle in. However, its difficulty, ingenious mechanics, variety of environmental effects and open-ended nature make for an incredibly deep experience that will keep throwing up new problems for as long as you’re willing to solve them.

The game does its best to make you remember that there are lives at stake. Try to focus on the mission, okay?

Tough, tense, and hugely atmospheric, Into the Breach is a strategy game for big time players. Great pixel art and some fantastically appropriate musical pieces all add to a high quality strategy experience, with unlockable mech squads and pilots, and additional, advanced options allowing experienced players to tweak gameplay to their heart’s content.

Climb into your mech, steel yourself for the horrors you’re about to witness, and give this strategy gem the chance it deserves. After all, you can always abandon this timeline and jump to the next if things don’t work out.

Played on Switch

Aero the Acro-Bat – Retro Review

Bother in the Big Top

This review was written for Issue 8 of the sadly now defunct Sega Mania Magazine, as such it is written from a ’90s perspective.

Does anyone actually like the circus? I mean, I’m sure they were great in the olden times, when the only other forms of entertainment were gathering around the wireless or playing with a hoop and a stick, but do we really need them here in the futuristic ’90s? We have television, spectator sports and video games, bars and nightclubs, Pogs and Slinkies. I for one think that it’s time for circuses to go. The animals don’t want to be there, I question the motives and mental capacity of anyone who chooses to be a clown, and acrobats can use their impressive suppleness and contortionist abilities elsewhere. Maybe they can perform elaborate robberies or something.

Aero the Acro-bat for the Mega Drive has an unavoidable big top vibe, with the titular Aero being the game’s protagonist and the star of the in-game show. A villainous industrialist named Edgar Ektor has sabotaged the World of Amusement Circus and Funpark, and has kidnapped all of its performers, replacing them with nefarious, evil clowns and other such appropriately-themed bad guys. It’s fallen upon Aero to use his high-flying skills and acrobatic feats to save the day, rescue his girlfriend Aeriel, and put a stop to Ektor’s machinations. This includes taking care of Ektor’s lead henchman, a certain Zero the Kamikaze Squirrel.

Aero is contemplating the tiny, one-hit-kill spikes that infest every stage. Can you see it?

If you’ve seen Aero the Acro-bat before, you’ll know that he represents yet another developer having a dip into the “critters with ‘tude” well. This time it’s Sunsoft who have their straws out, attempting to slurp up some of Sonic’s lucrative success water. Have they backed a winner with this Chiropteran tumbler? I’m not so sure. The designers doubled down on the mean and cool attitude and forgot to add any charm or charisma. Also, he’s a circus performer, which means I immediately question his moral and social ideals.

Initial impressions paint Aero the Acro-bat as a fairly standard platformer, and it feels a little dated compared to some of the platformers that have appeared in recent years. Aero himself is somewhat stiff to control, and he commits that platformer hero sin of not being able to stop quickly, which can result in some aggravating slides into certain doom. The stages, while colourful, seem fairly lifeless, with levels that don’t evolve as you progress and forgettable enemy designs. There is some stage variety later on, with a few cool gimmicks that are mostly based on fairground rides, but nothing really stands out or sticks with you. Visually, this is closer to James Pond or Krusty’s Super Fun House than it is to Ristar or our iconic hedgehog pal.

A bat in a barrel, rolling past featureless trees and hills.

Mechanically, the level design philosophy seems frustratingly centred on catching the player out with traps that they could not have foreseen. The admittedly-large levels are littered with spikes, and said spikes are small and inconspicuous, and are often found in the most annoying of places. For example, some of the levels ask you to jump on certain platforms, which causes them to disintegrate, and you can be darned sure there are going to be spike pits underneath all of them. There’s a particular spiked pit during act two that you get dumped into immediately after a unicycle tightrope ride, the likes of which have thus far given you no reason to think they’re going to end in certain, spiky doom. This would all be fine if the spikes just made you lose some health, but these barbed bad boys are insta-death, baby.

If you’re a glutton for punishment, have oodles of time to spare, and enjoy memorising massive levels using a process of trial and error that involves lots and lots of dead bat, then you might get a lot of enjoyment out of Aero the Acro-bat, as there is satisfying gameplay to be found once you’ve mastered Aero’s initially-awkward dive attacks and formed your mental map of the levels. It’s a heck of a slog to get there though, and with its forgettable mascot, uninspiring visuals, small sprites and irritating, circus-themed music, you might not want to go through the trouble.

The rollercoaster section is just another memory test.

I can’t help but feel that the game doesn’t want you to have fun. Did you know that bats are the only mammal capable of true, full flight, and are even more nimble and agile when airborne than most birds? Not this one. He can hover for a bit, and can only fly temporarily after collecting a certain power-up. He’s also able to fire star projectiles, but they’re extremely limited, he starts with none, and the pick-ups are located in fiddly places to get to. Enemies are positioned specifically to catch you out, which you could say about your average Sonic the Hedgehog level, but Sonic’s zones are mostly focussed on fun, spectacle, exploration and a satisfying challenge, rather than just aggravating schmuck bait.

The Mega Drive is absolutely stuffed with top quality mascot platformers, and Aero, despite all of his impressive acro-bat-ics, struggles to even trouble the top 20. Perhaps he should go back to shooting soundwaves at unsuspecting moths or sucking blood out of horses. You know, all that bat stuff that real bats do.

I hope this was an enjoyable little extra for any Sega Mania fans out there. I wrote one more review for Issue 8 which I will be posting at a later date, and I may also be uploading some of my favourite reviews from throughout the mag’s seven issue run, so stay tuned!